
One of the needs that often comes up when you’re building an AI powered application is a smart way to manage a prompt library. Even if, due to the nature of LLMs, chat is the predominant interfaced offered by AI applications, there are many scenarios where AI stays behind the scenes and augments the capabilities of the application. Think, for example, to Copilot for Microsoft 365. Many experiences are chat based, but there are also many experiences which are triggered directly in the user interface. In Outlook, when you want to get a summary of a thread, you click on the Summary By Copilot banner at the top of the conversation; in Word, when you want to convert a content into a table, you select it, right click on it and you choose Copilot -> Rewrite as a table. In all these scenarios, the user doesn’t see “the magic behind” but, in the background, Copilot is just executing a prompt.
In all these scenarios, you can’t just rely on having a prompt hard coded in the application. You need a way to manage it, test it, easily change it without rebuilding the application. On this blog, we have learned a way to do that by using one of the features offered by Semantic Kernel: prompt functions. However, recently Microsoft has introduced a new solution to standardize prompts and its execution into a single asset that we can use to improve the management of our prompts in our applications. It’s called Prompty and it’s part of PromptFlow, a suite of development tools from Microsoft to streamline the end-to-end development of LLM based applications.
Specifically, Prompty relies on PromptFlow to give you the ability to test prompts without needing to write the code to execute it or to run the full application.
Let’s take a deeper look!
Start with Prompty
The easiest way to start with Prompty is by installing the dedicated Visual Studio Code extension. Once you have installed it, you will get the ability to right click on Explorer and choose New prompty. This will create a new file in the folder called basic.prompty, which is a YAML file that contains an example of a prompt.
As you can see, the file is more complex than the prompt functions we have seen in the past and it allows much more flexibility. Let’s take a look at the content of the file and, along the way, we’re going to customize it.
At the top of the file, you will see a section wrapped into three dashes (---). This is the configuration section which, however, will cover later, you’ll understand why shortly. Let’s start with what we find below, which is the actual prompt. You can immediately notice how you can express a full conversation using the Chat Completion API style:
- We can define multiple actors in the conversation (system prompt, user prompt, etc.)
- We can provide variables that, at runtime, will be replaced with values coming from the application.
This is how my section looks like for my prompt:
|
|
First, we can notice how we are basically setting up a whole agent, since we are providing a system prompt (to instruct the LLM on how to respond) and a user prompt (which is the message we’ll get from the application).
Second, despite the prompt is generic (you are an AI assistant who helps people find information), we are using variables to make it more dynamic. We are instructing the LLM to always address the user with their name and we are providing some information the LLM can use to generate an answer (think of it like a super simplified RAG implementation).
All these three variables (name of the user, context and question) are supplied with a parameter, using the {{variable}} syntax. When we’re going to invoke this prompt from our application, we’ll have to provide the values for these variables.
The sample section
At the beginning of the post, we have said that one of the benefits of Prompty is that it allows to test prompts without needing to write the code to execute it or to run the full application. How can we do that?
That’s where the sample section comes into play. In this section, which belongs to the Prompty configuration at the top, you can provide the values for the variables you have defined in the prompt and they will be used when we execute the prompt using the built-in tools provided by Visual Studio Code.
Let’s take a look at my sample section:
|
|
As you can see, I’m providing the values for the variables I have defined in the prompt. When I’m going to execute the prompt, these values will be used to generate the response. Again, it’s very simplistic, but it’s a very basic RAG implementation: we are asking a question (the type of services offered by a fictional company called Contoso Electronics) and, in the context, we are providing the information that the LLM can use to answer it.
Testing the prompt
Now that we have completed the creation of the prompty file, we can actually test it without needing to write any code. There are multiple ways to do that, let’s start from the easiest one, which is running it.
Before doing that, however, we must setup the AI service we want to use to execute the prompt. To do that, you must go in the Settings of Visual Studio Code and search for prompty with the internal search engine. You’ll see a section like the following one:
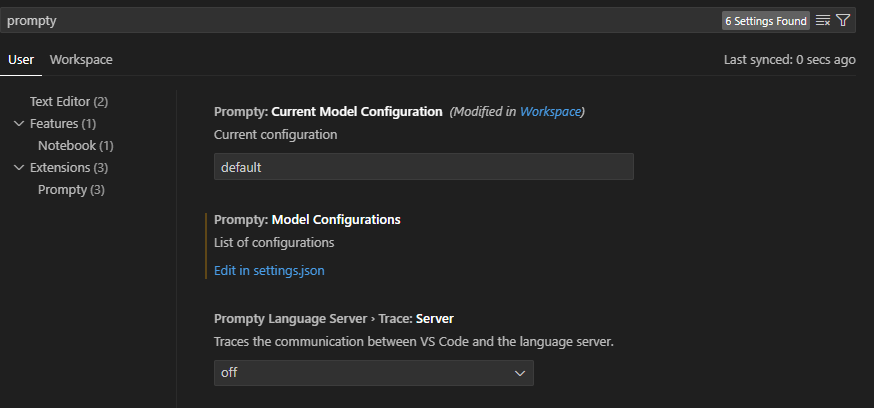
Click on Edit in settings.json below Model configurations to open the settings file, in which you will find a section named prompty.modelConfigurations. Here, you can configure one or more AI services, which could be based on Azure OpenAI or OpenAI. For example, here below is the configuration to use gpt-4o from my Azure OpenAI instance:
|
|
As you can see, you can specify more than one configuration. They will all show up in the Visual Studio Code status bar at the bottom:
![]()
If you click on it, you will be able to choose one of the services that you have previously added in the prompt.modelConfigurations section.
Once you have selected the model you want to use, make sure to focus Visual Studio Code on the prompty file, then click on the play button at the top right of the file to execute the prompt:
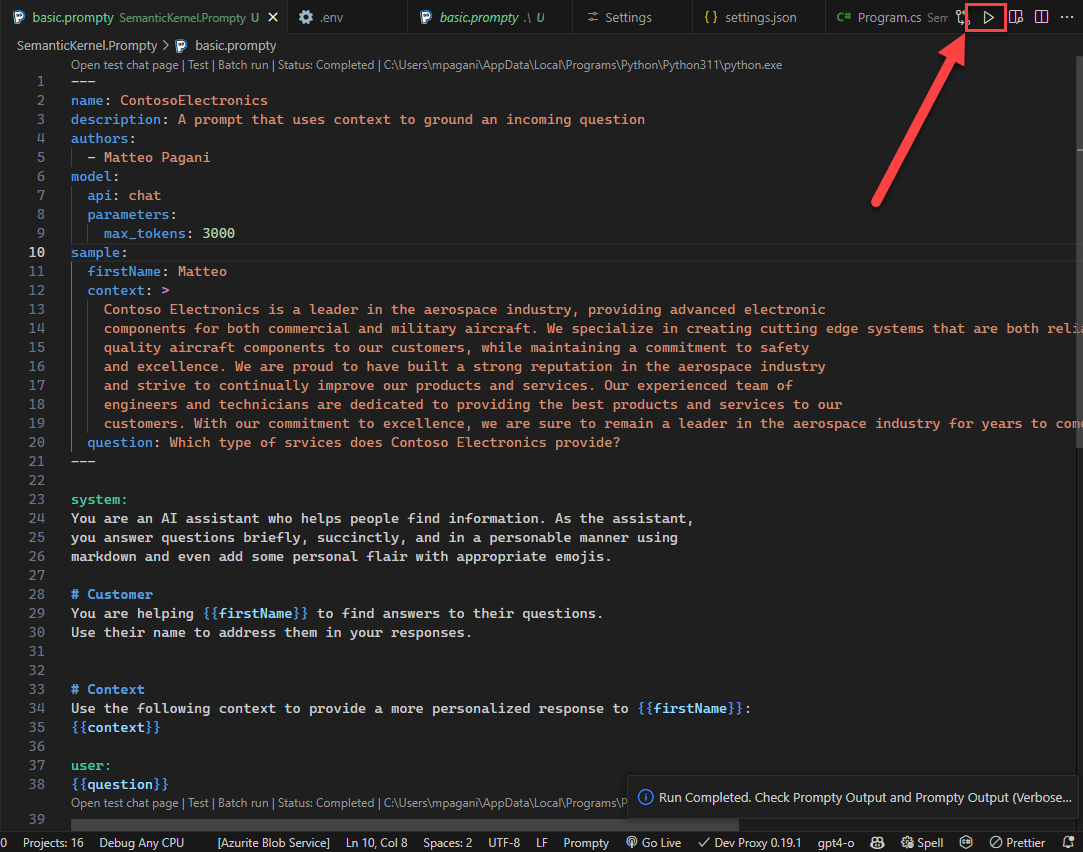
If you have set up the AI service in the right way, Visual Studio Code will run the prompt against the LLM and will fill the variables with the values we have set in the sample section. You will see the response in the output panel:
|
|
If you prefer, in the panel list, you will find also a panel called Prompty Output (Verbose), which will show you the entire API communication with the AI service and the JSON request and response.
Pretty cool, right? We have been able to test the quality of our prompt without needing to write any code. And, if we want to make any change, we can just edit the prompty file and run it again. For example, let’s slightly change the system prompt:
|
|
We have added an instruction to return the response in JSON format, rather than in Markdown.
We can just hit Run again to see how the response is changing:
|
|
But that’s not enough! We can do more advanced testing thanks to Prompt Flow.
Let’s take a look!
Advanced testing with Prompt Flow
When you worked on the Prompty file, you might have noticed that, at the top, Visual Studio Code was showing up a few options at the top:

All of them are based on Prompt Flow, and the most interesting one is Open test chat page. The Test one, in fact, will simply execute the prompt, like we have done before but with the additional requirement of needing to setup Prompt Flow. Open test chat page, instead, will give us a chat interface that will allow us to do deeper experiments with the prompt.
Before using it, we must setup Prompt Flow however. This technology is based on Python, so the first step is to make sure you have a Python environment installed on your machine. If you don’t have it, you can quickly install it thanks to WinGet if you’re on Windows. Open a terminal and run the following command:
|
|
Once you have Python installed, you can install Prompt Flow using the Python package manager, called pip:
|
|
When we use this approach to test our prompt, there’s an important difference: we aren’t executing anymore the prompt using Visual Studio Code (which directly calls the Azure OpenAI APIs), but using the Prompt Flow service. As such, we can’t leverage the model configuration we have previously created in the Visual Studio Code settings, but we must add a new section to our prompty file called model, like in the following example:
|
|
This is the meaning of the various parameters:
api: it’s the type of API you want to use. In our case, we usechatto use the chat completion service.configurationis used to specify the service configuration with the following parameters:type: this is the AI service you want to use. In my case I’m using Azure OpenAI, so I set this value toazure_openai. Based on the type, the other parameters will change, since Azure OpenAI and OpenAI have different connection methods.* azure_endpoint:this is specific for Azure OpenAI and it’s the URL of the service you want to use.* azure_deployment:this is specific for Azure OpenAI and it’s the name of the deployment of the model you want to use.* api_version:it’s the version of the API you want to use.
parametersallows you to specify different parameters to customize the model interaction, like the temperature or (like in this case), the maximum number of tokens to use.
As you can see, unlike we did in the Visual Studio Code settings, we don’t have a way to specify the API key. This is because Prompt Flow requires to use the Microsoft Entra authentication in order to securely connect with Azure OpenAI. For this reason, you will need to have installed on your machine the Azure CLI, which enables a series of commands to work with Azure.
Once you have installed it, run the following command:
|
|
You will be guided through a series of steps to authenticate with your Azure account and to choose the subscription in which you have deployed the Azure OpenAI service. Once you have gone through this process, you will need to assign a dedicated role to your account to be able to leverage the integrated Microsoft Entra authentication. Open the Azure portal and open the Azure OpenAI instance that you’re using. Click on Access Control (IAM) and then Add -> Add role assignment.

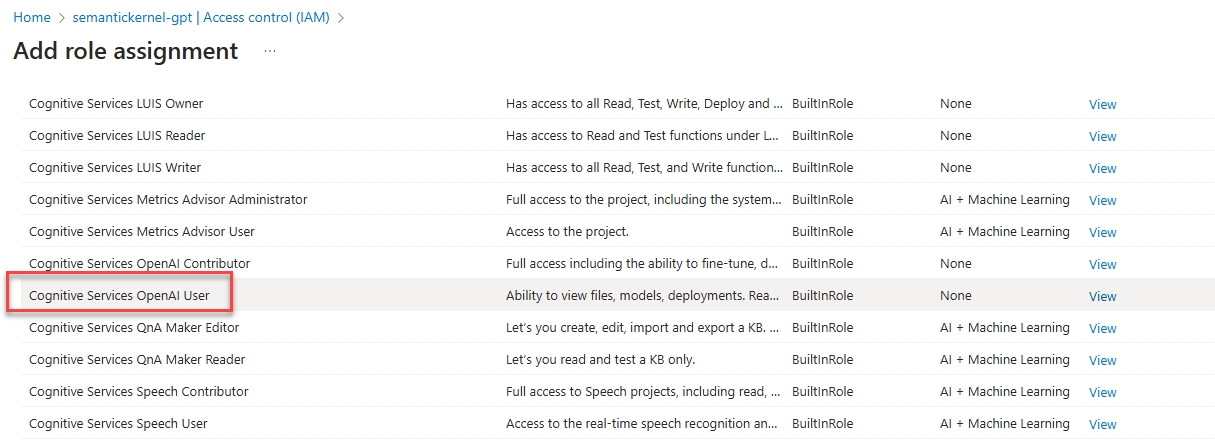
In the first step, in the Role tab, look for a role called Cognitive Services OpenAI User and select it. Then click Next.
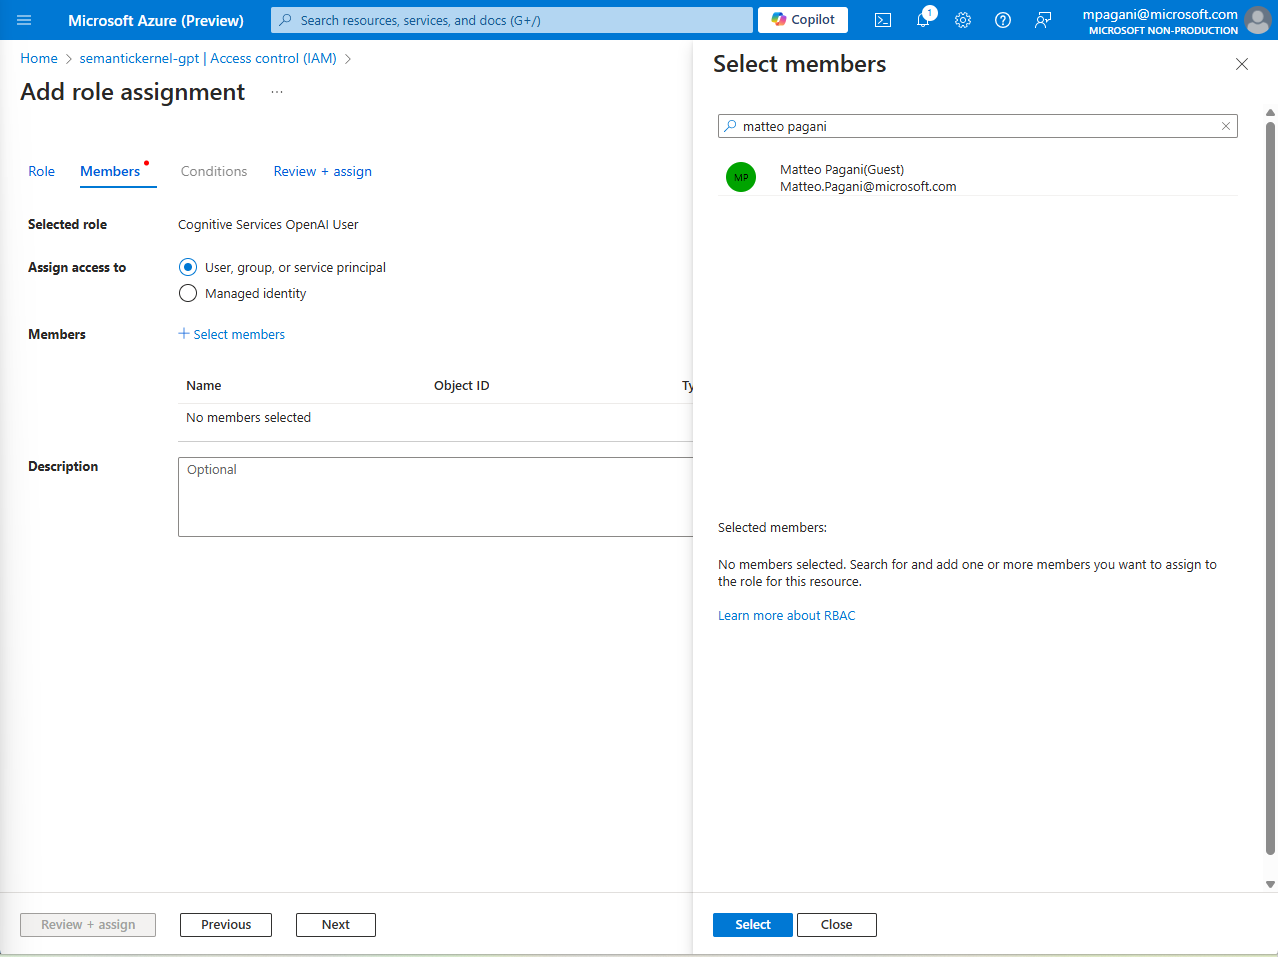
In the Members tab, make sure that the option Assign access to is set to User, group or service principal and click on Select members. From there, search for your account and click on Select:
Click on Review + assign two times and wait for the operation to complete.
Now you should be good to go. To quickly test if you did everything properly, you can just click on the Test option at the top of the Prompty file. Visual Studio Code will launch the Prompt Flow service and will execute the prompt. You should get a similar result than the one we have seen before.
However, we said that the most interesting integration is the chat interface, so click on Open test chat page. This option will launch again the Prompt Flow service but, at the end, you should see your browser opening up on a local server that will show you a chat interface like the following one:
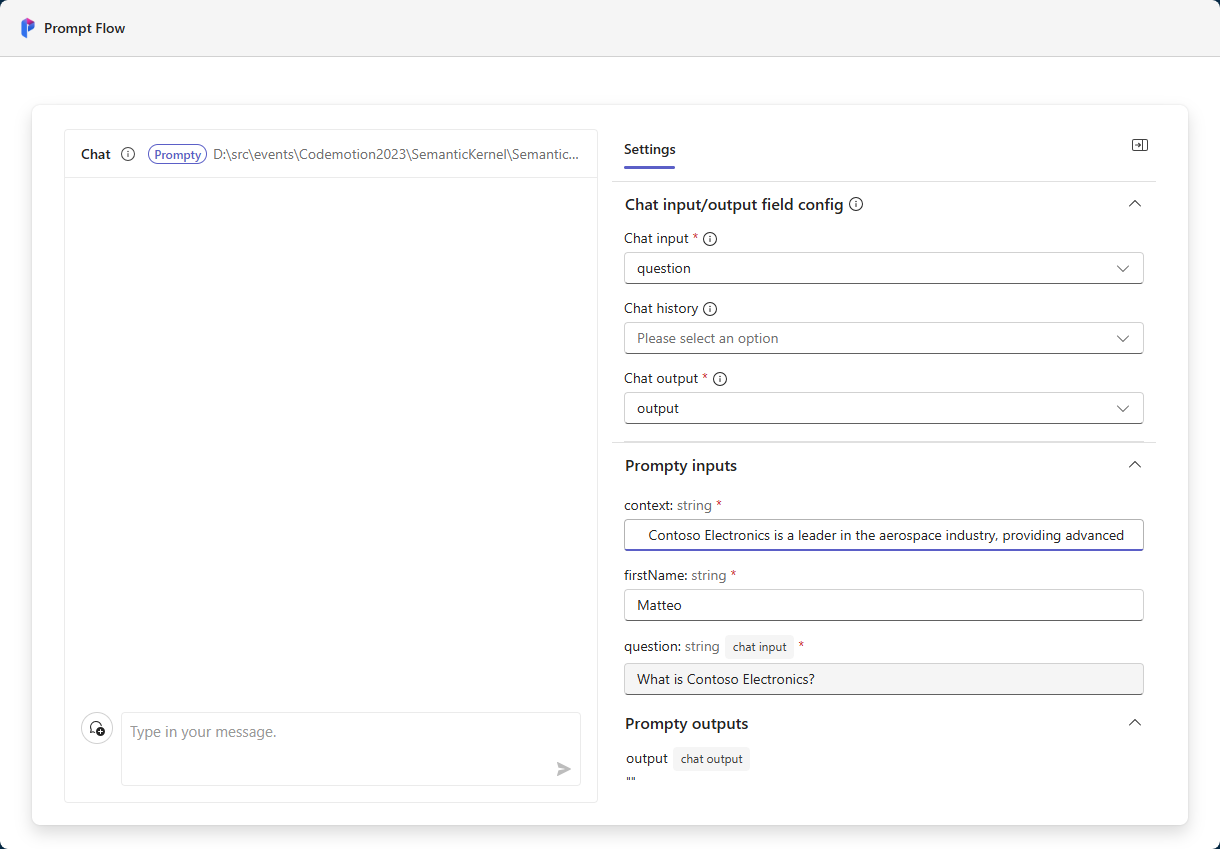
On the panel on the left, you can setup the input and outputs of the conversation:
- Under Chat input/output field config, the most important parameter to set is Chat input. You must specify, among the parameters supported by your prompt, which is the one mapped with the user input. In my case, it’s the
questionvariable. - Under Prompty inputs, you must assign a value to each of the parameters you have included in your prompt (except the one which you’re going to get from the chat input). In my case, I had to provide a value for
context(the paragraph about the fictional company Contoso Electronics) and forfirstName(the name of the user).
Now you can just chat using the chat interface on the left. Prompt Flow will send the prompt to the LLM and it will fill all the parameters with the values you have provided, either in the chat or in the Settings panel. Let’s ask, for example, What is Contoso Electronics?
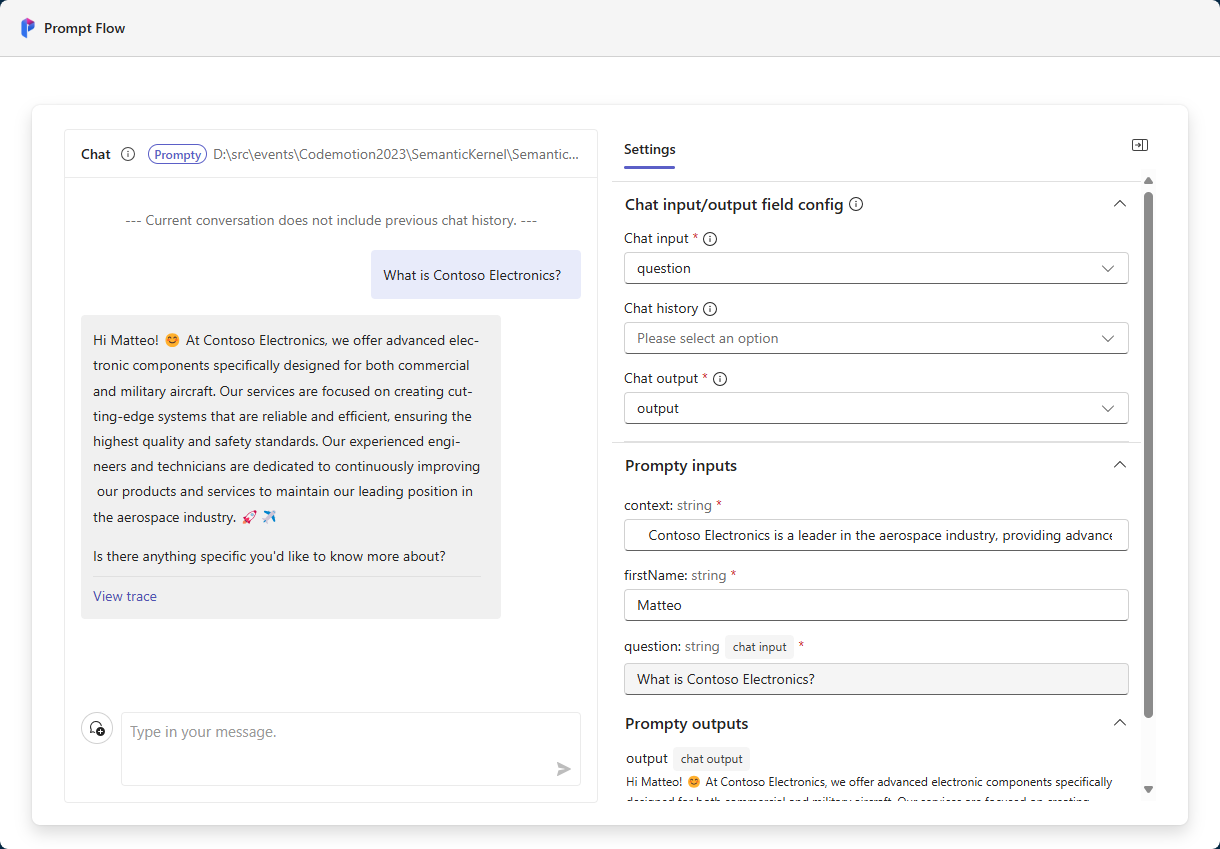
You can notice how the instructions we have provided in the prompt are followed: the LLM is addressing the user with their name and is using the context to provide a more personalized response. If you want, you can click on View trace to see the inner details of the operations, like the raw API calls.
Using Prompty with Semantic Kernel
Now that we have tested our prompt, we are ready to use it in our application. Again, the Visual Studio Code extension simplifies the process. Right click on the Prompty file and you will see the option to generate code for various AI frameworks, including Semantic Kernel:
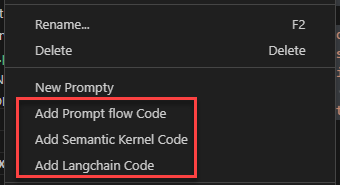
Click on Add Semantic Kernel code and you will get a new file with the following code:
|
|
If you have already experience with Semantic Kernel, the code will be familiar to you. We are creating a new instance of the Kernel class and we are setting it up with our Azure OpenAI instance.
However, we can notice a new method called CreateFunctionFromPromptyFile(), which will create a prompt function starting from a Prompty file. We just need to pass, as parameter, the relative path of the Prompty file we want to use.
To use this feature, however, we must install a new NuGet package, which is currently in preview: Microsoft.SemanticKernel.Prompty. As such, in the NuGet Package Manager, you’ll need to enable the Include prerelease option to see it.
The code generated by Visual Studio Code requires an additional change. As you can see, through the KernelArguments collection, we are providing a value for only one of the three parameters used by the prompt, question. As such, we need to enhance the collection to add the missing ones, firstName and context.
We also need to wrap the CreateFunctionFromPromptyFile() method in a pragma directive, since the feature is marked as experimental, otherwise the code won’t compile.
This is the final version of the code:
|
|
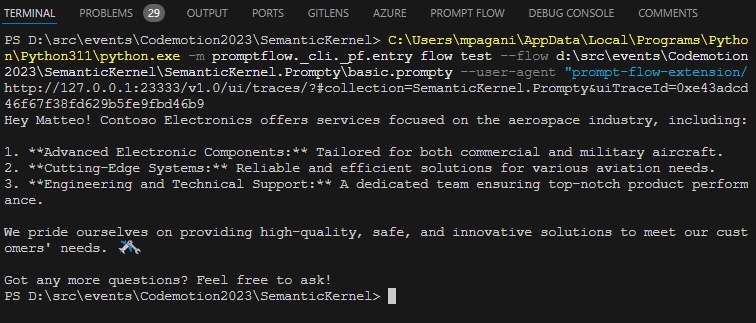
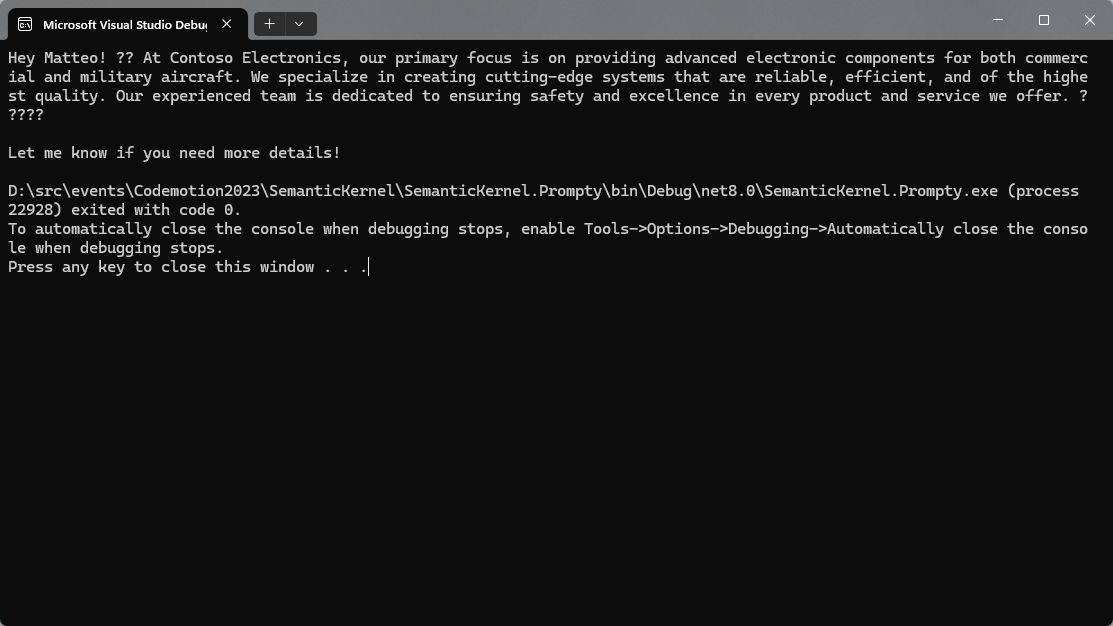
If you run the application (in my case, it’s a .NET Console application), you will see a similar output than the one we have observed during our tests:
Wrapping up
In this post, we have seen a new way to manage prompts and their execution in our applications, thanks to Prompty, a new solution from Microsoft to standardize prompts and templates. Compared to prompt functions, with Prompty we can use a more powerful syntax, enable more complex scenarios and, most of all, test the quality of our prompt engineering skills right in Visual Studio Code, before writing any code.
Once you have validated your job, you can easily import the Prompty file into a Semantic Kernel based application. And if you are a Python developer, Visual Studio Code gets you covered, since you can quickly generate a code file for LangChain as well.
You can find a Semantic Kernel sample about Prompty in my catalog of samples on GitHub.
Happy coding!