
This is a guest post, written by Bharath Bath and Anubhav Ranjan, who work in my team at Microsoft and they are specialized in pushing the boundaries of Microsoft 365 copilot agents to support customer scenarios.
In the previous posts, we built a multi-agent solution/workflow using AutoGen where we had a MC agent kicking off a rap battle by providing a topic to 2 rapper agents that created lyrics in the styles as per their Persona. We also had a Judge agent who rated whose lyrics was better. This scenario helped understand how multiple agents can be configured to run independently on a particular task. This can be very well mapped to any real-world scenarios where we may need multiple agents to work in a collaborative fashion and help arrive at a solution.
Introducing Copilot extensibility
Let’s pause here for a moment and talk about Microsoft 365 Copilot. As you may already be aware, it is possible to extend Copilot to connect it to 3rd party systems and extract information or perform actions on behalf of the user.
Wouldn’t it be great if we could get Copilot to also connect with these multi-agent frameworks to get our job done?
Jumping back into the rap battle scenario, let’s assume we want to initiate the battle via Microsoft 365 Copilot and get AutoGen agents to work in the background and get us the best judged lyrics.
To achieve this, we will need to do the following:
- In AutoGen
- Download the Rap Battle workflow
- Use AutoGen Studio to serve the workflow, so it is available to be called as an API.
- Create a Declarative Agent using Teams Toolkit (TTK) via Visual Studio Code that can invoke this call.
- Configure the declarative agent action and the request/response message formats expected by Autogen
- Provision the Declarative agent using TTK, so it’s available with Teams on the right pane inside Copilot, ready to be triggered.
- Forward the port used by AutoGen studio and make it publicly available via Teams toolkit.
Let’s dive into the details of each of these steps.
The AutoGen workflow
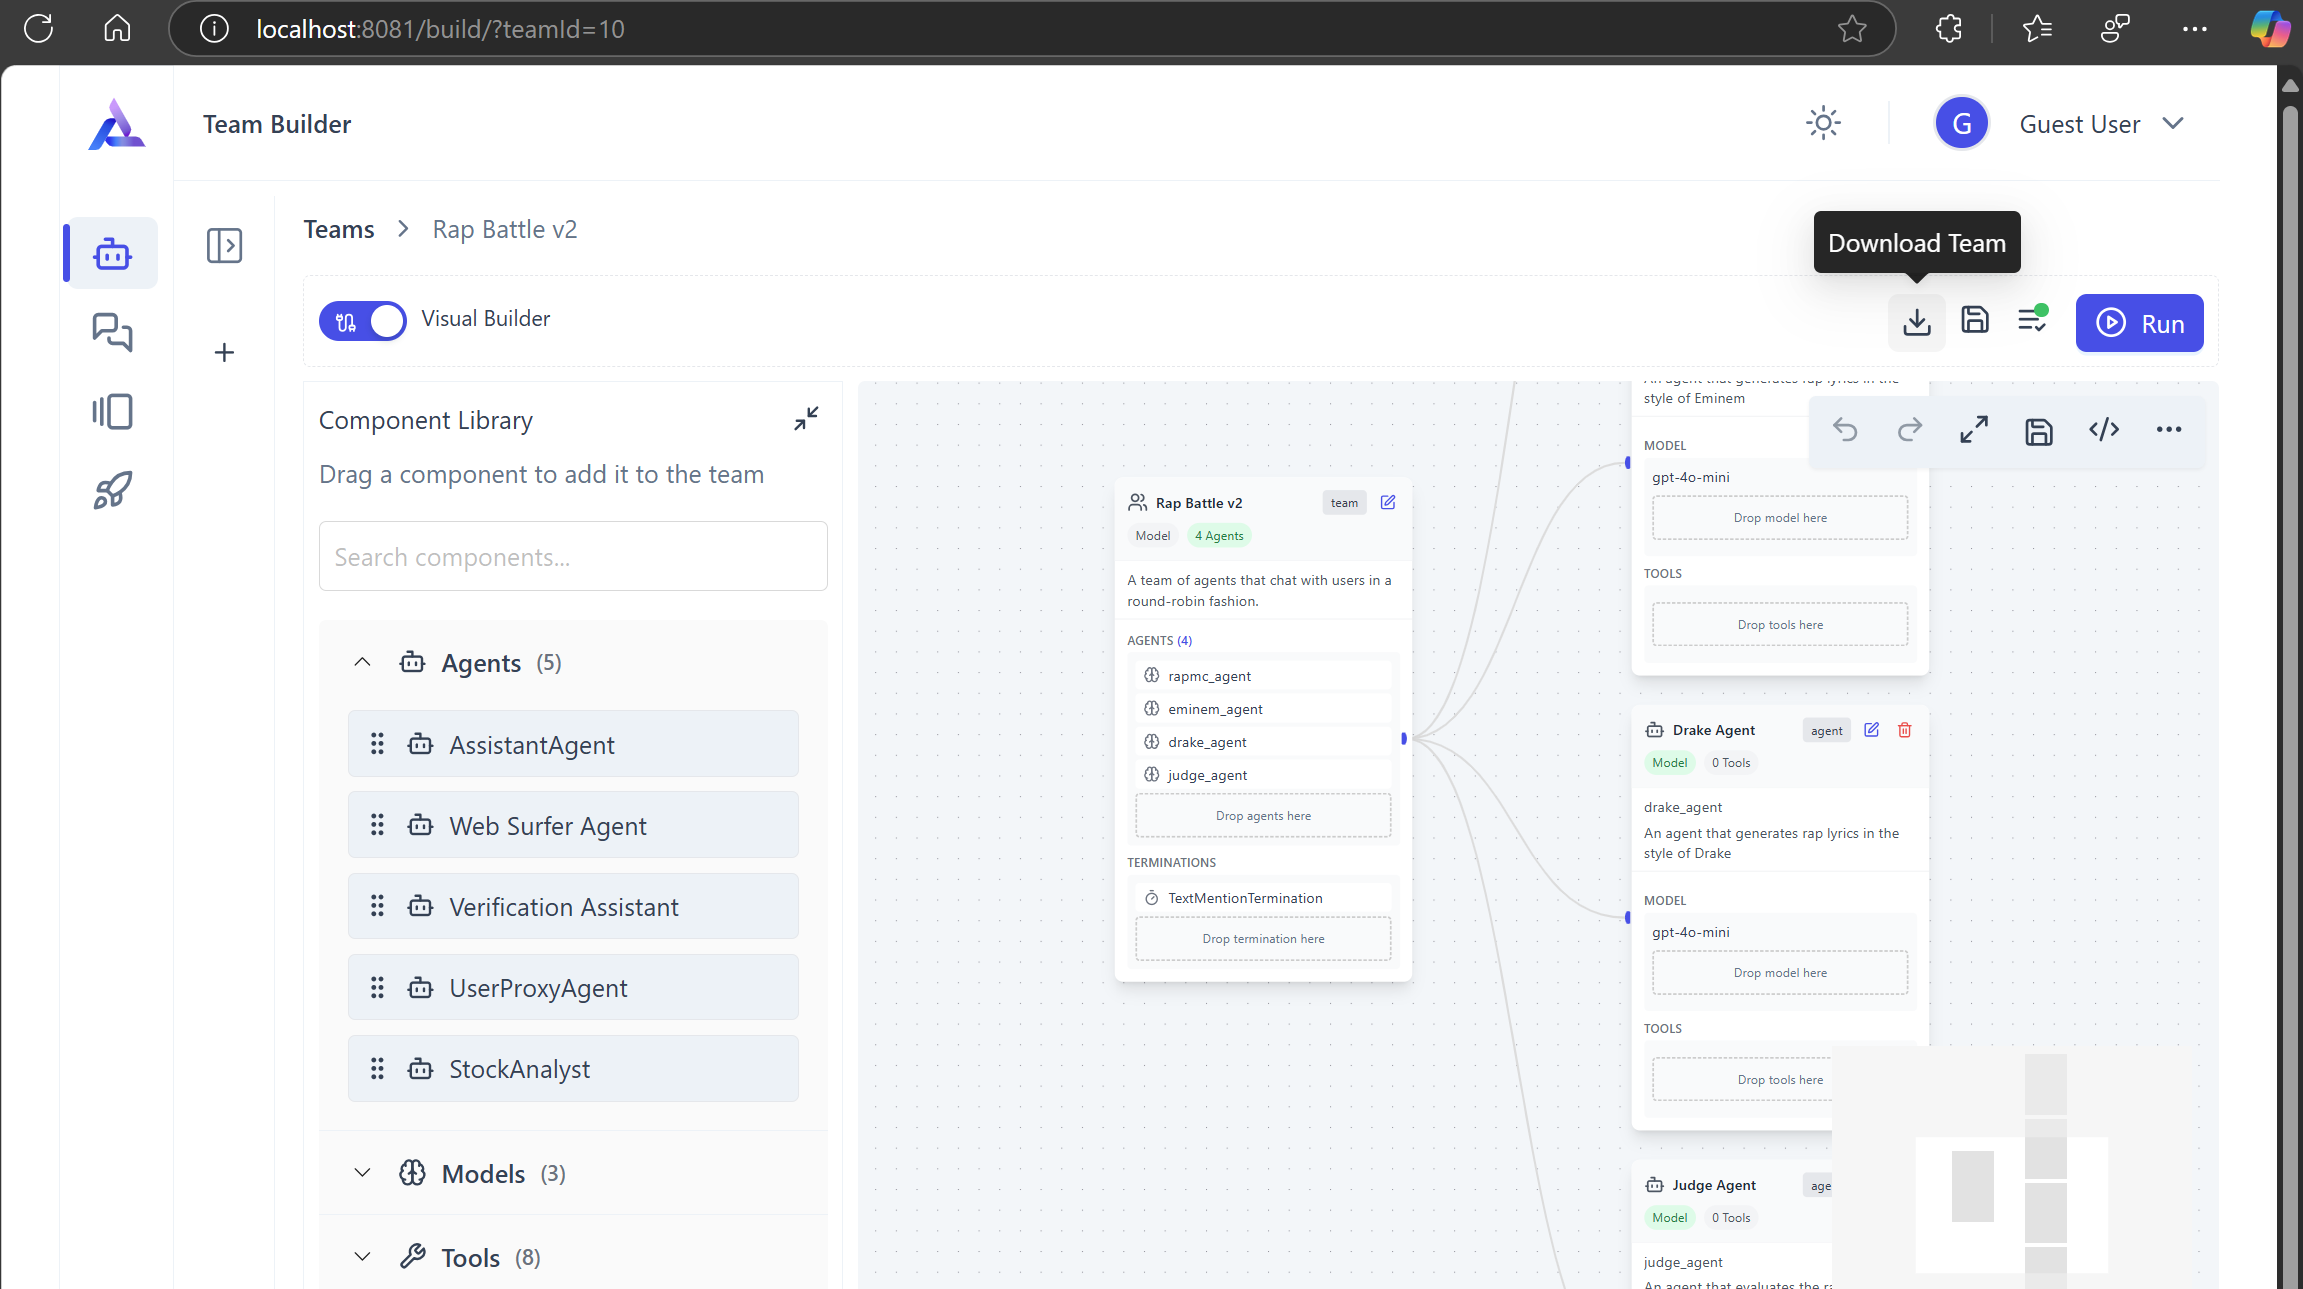
Let’s first run the AutoGen Studio and go to the AutoGen Studio browser tab and download the Rap Battle workflow by clicking on the download icon. This is the same step that we did in the code post to execute our team using code. A file named team-config.json will be downloaded. Let’s tove it to the folder from where we ran the AutoGen Studio. We will need this file later to leverage one of the AutoGen Studio features that we haven’t covered yet: the ability to expose a team through a REST API.
Configuring & provisioning the Declarative Agent
To perform the following steps, you will need Visual Studio Code with the Teams Toolkit installed and access to an environment with a Microsoft 365 Copilot license.
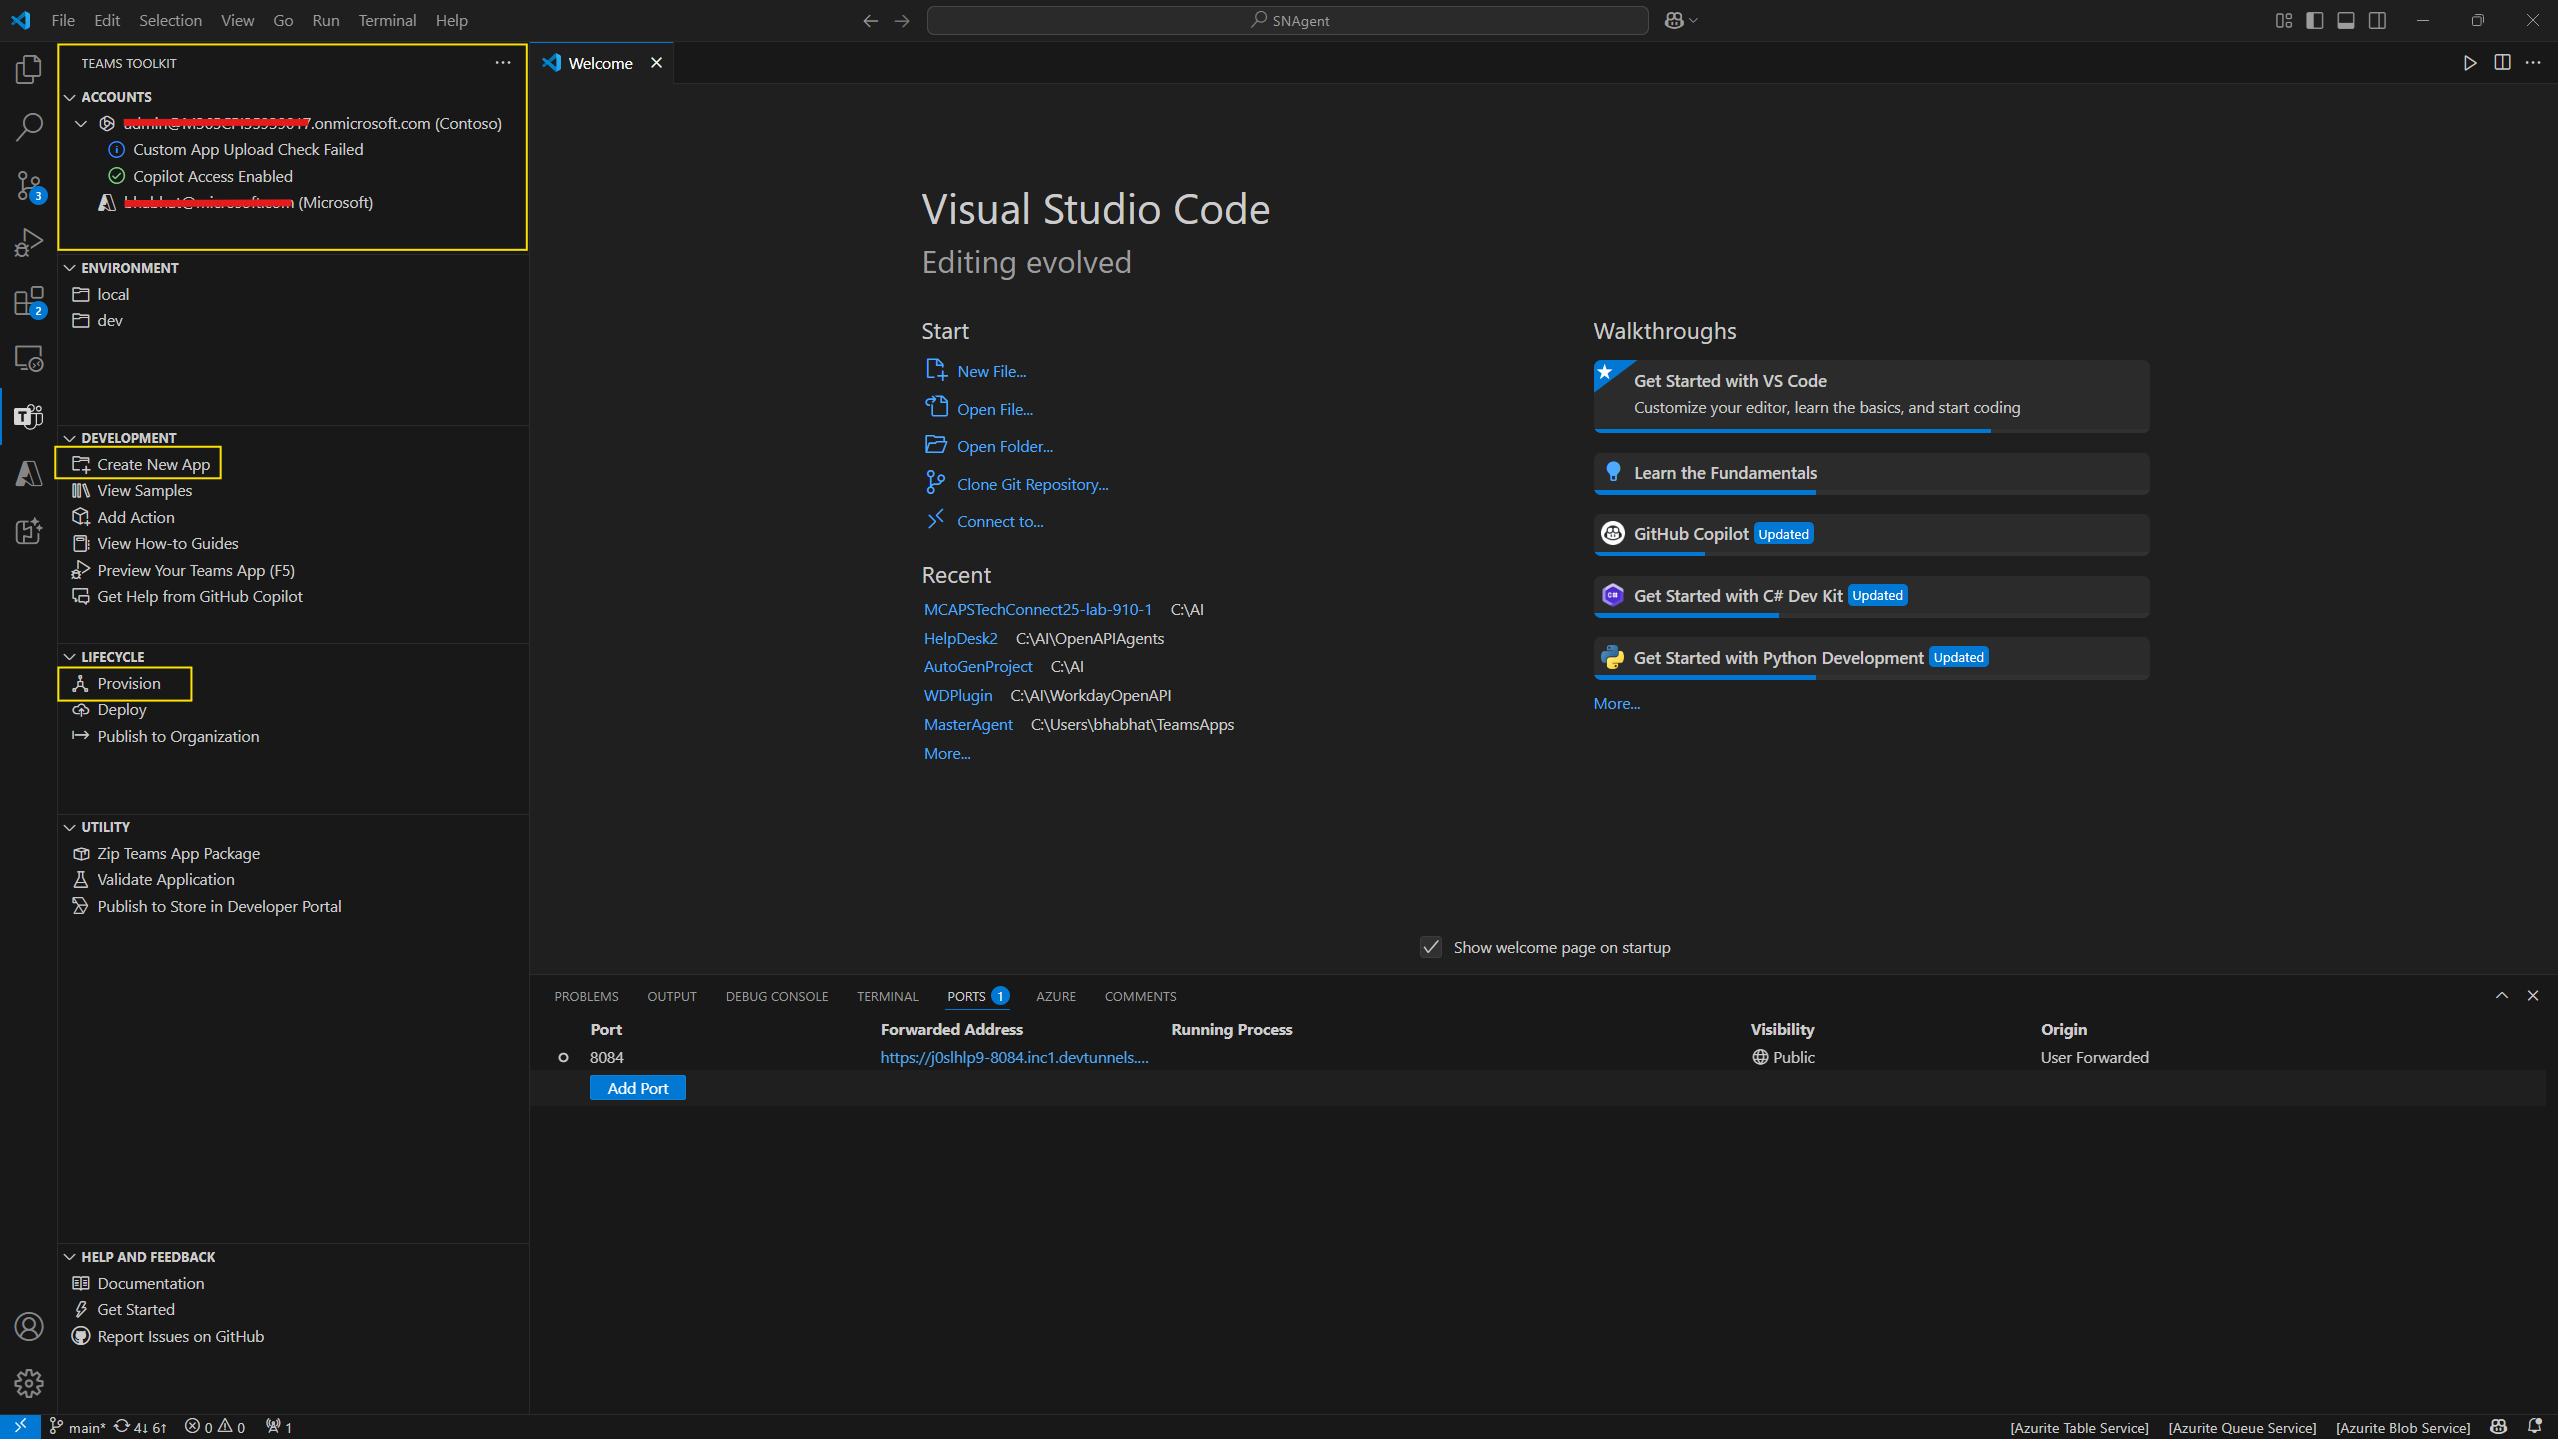
When you open the Teams Toolkit within Visual Studio Code, ensure that you have logged in to the environment with Copilot access as highlighted below. I have also highlighted 2 other options Create New App that will help create a new Declarative Agent and Provision that will help provision and test the Declarative agent within Copilot. So, let’s start with creating the Declarative Agent.
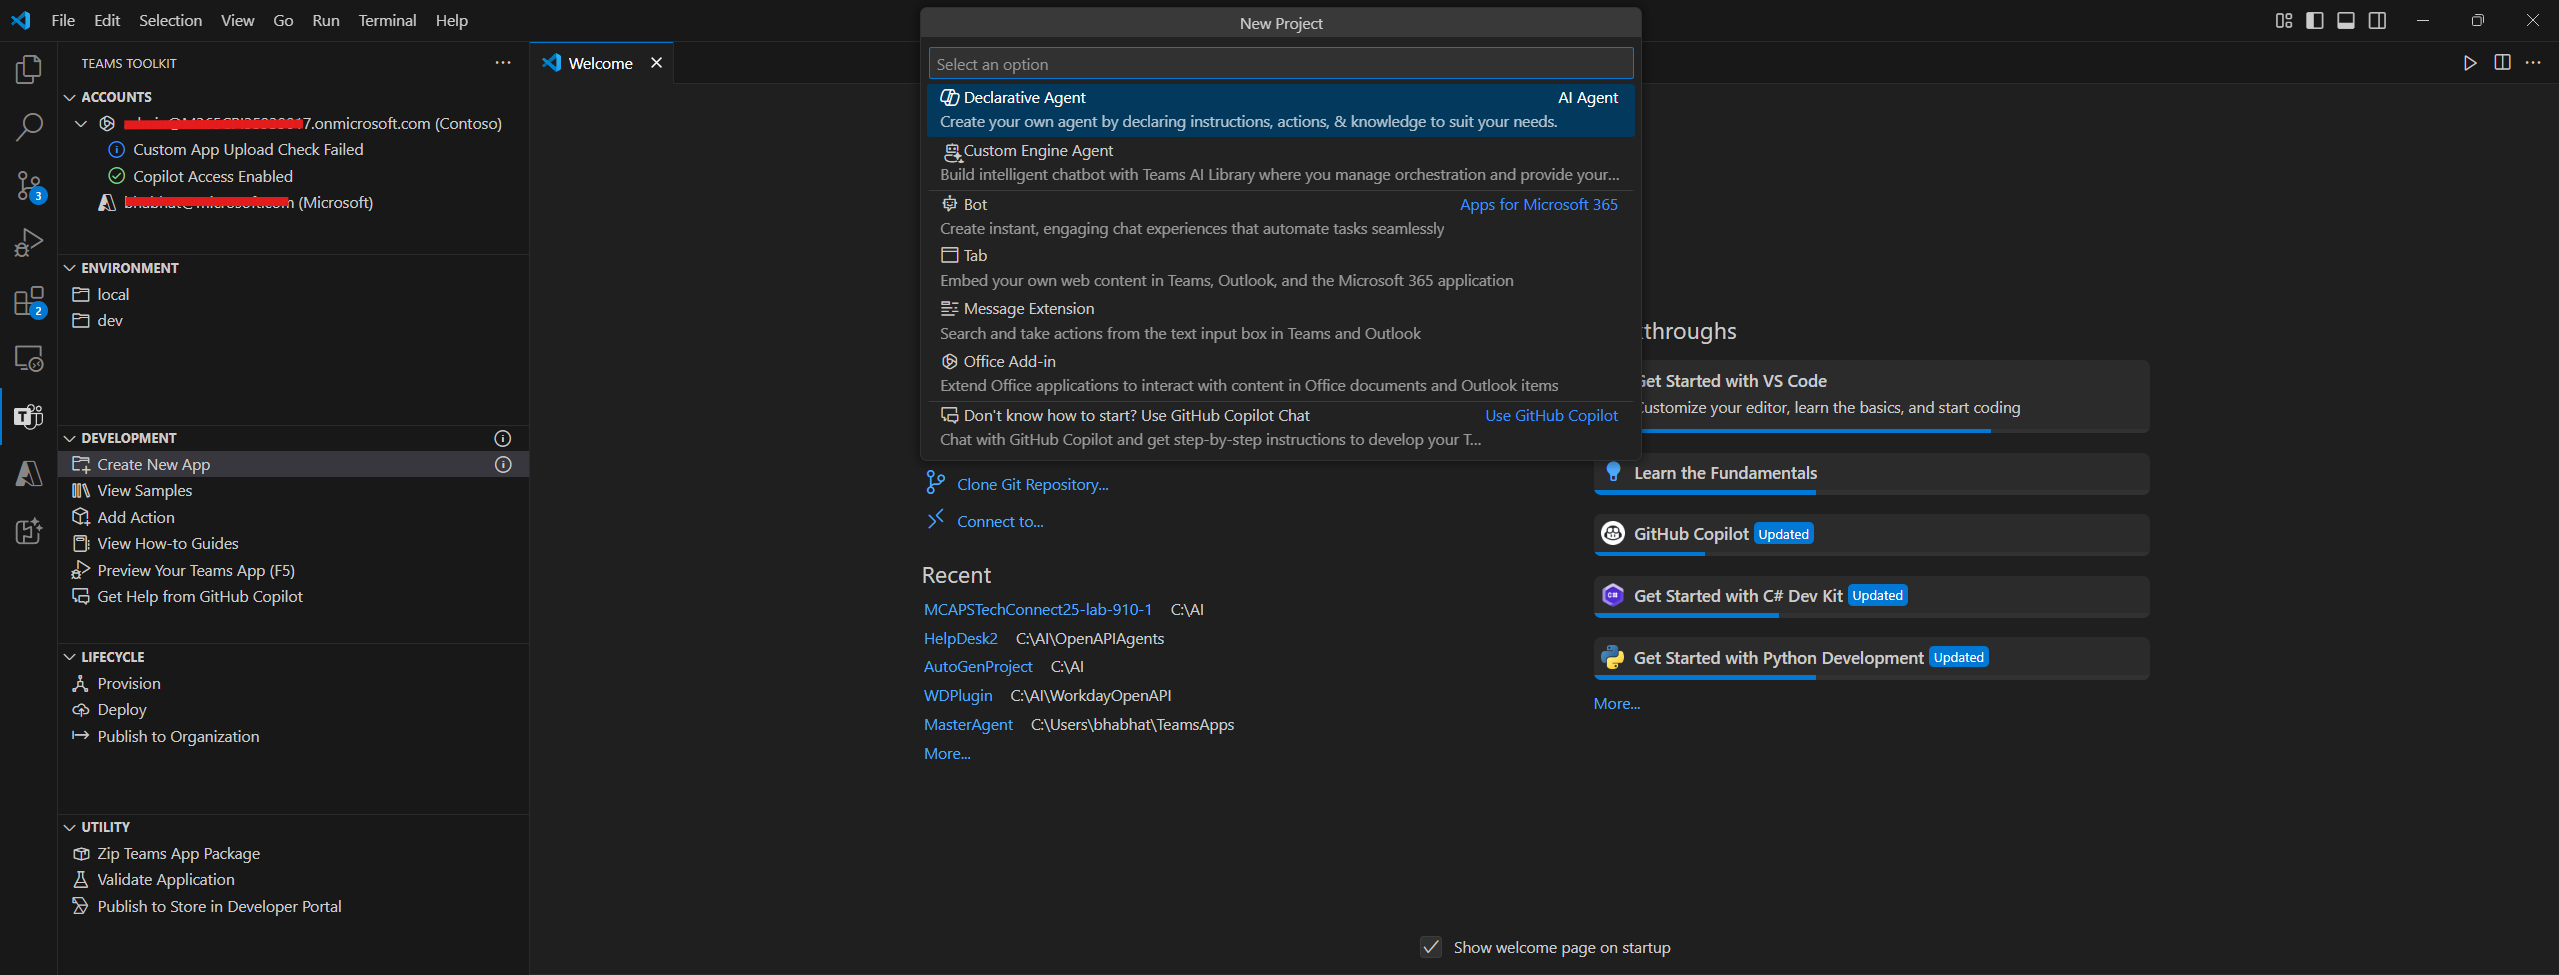
Clicking on Create New App will show the various options available. We will select the Declarative Agent option.
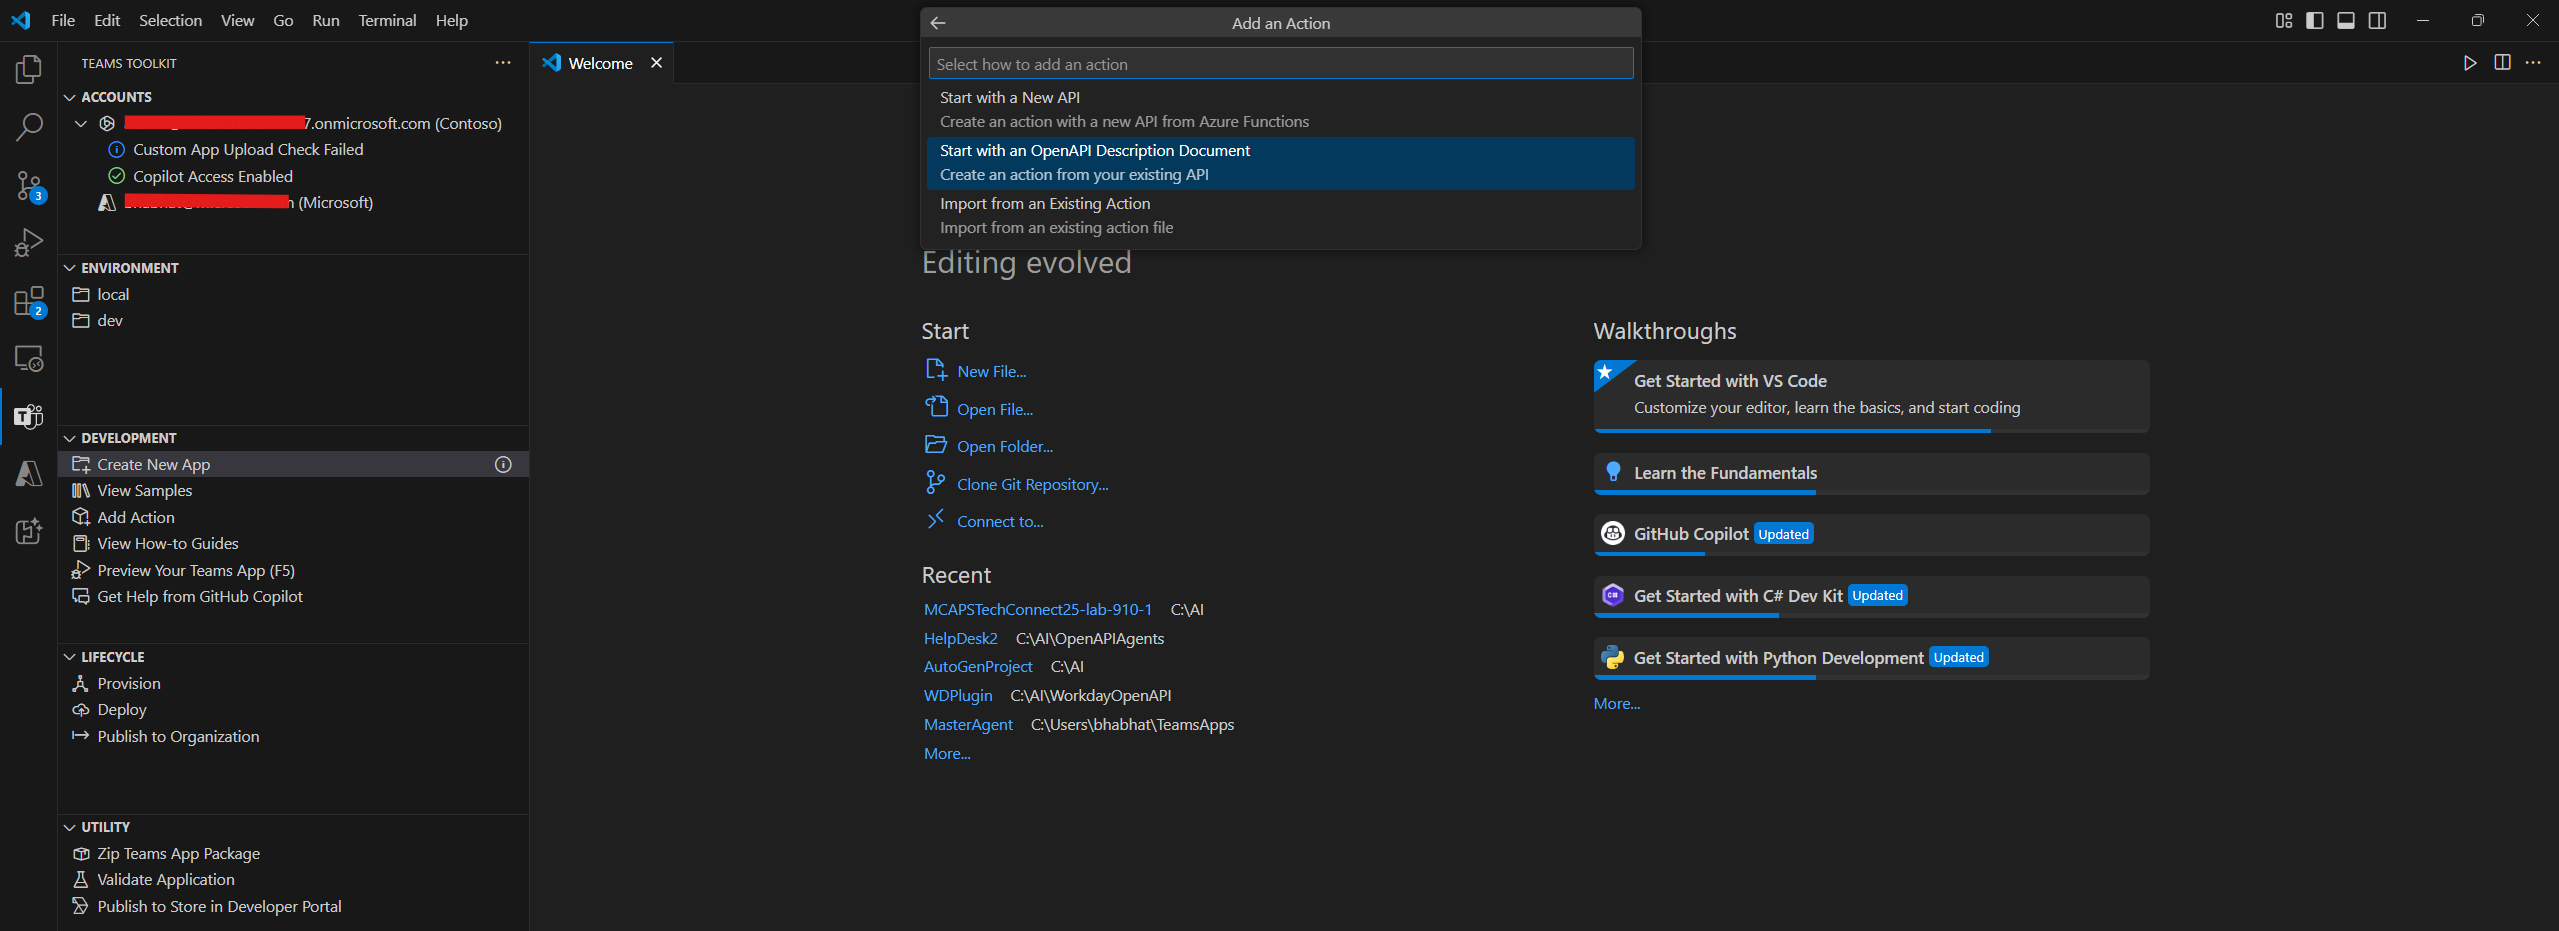
As we will be making a call to the AutoGen workflow, we will select Add an Action:

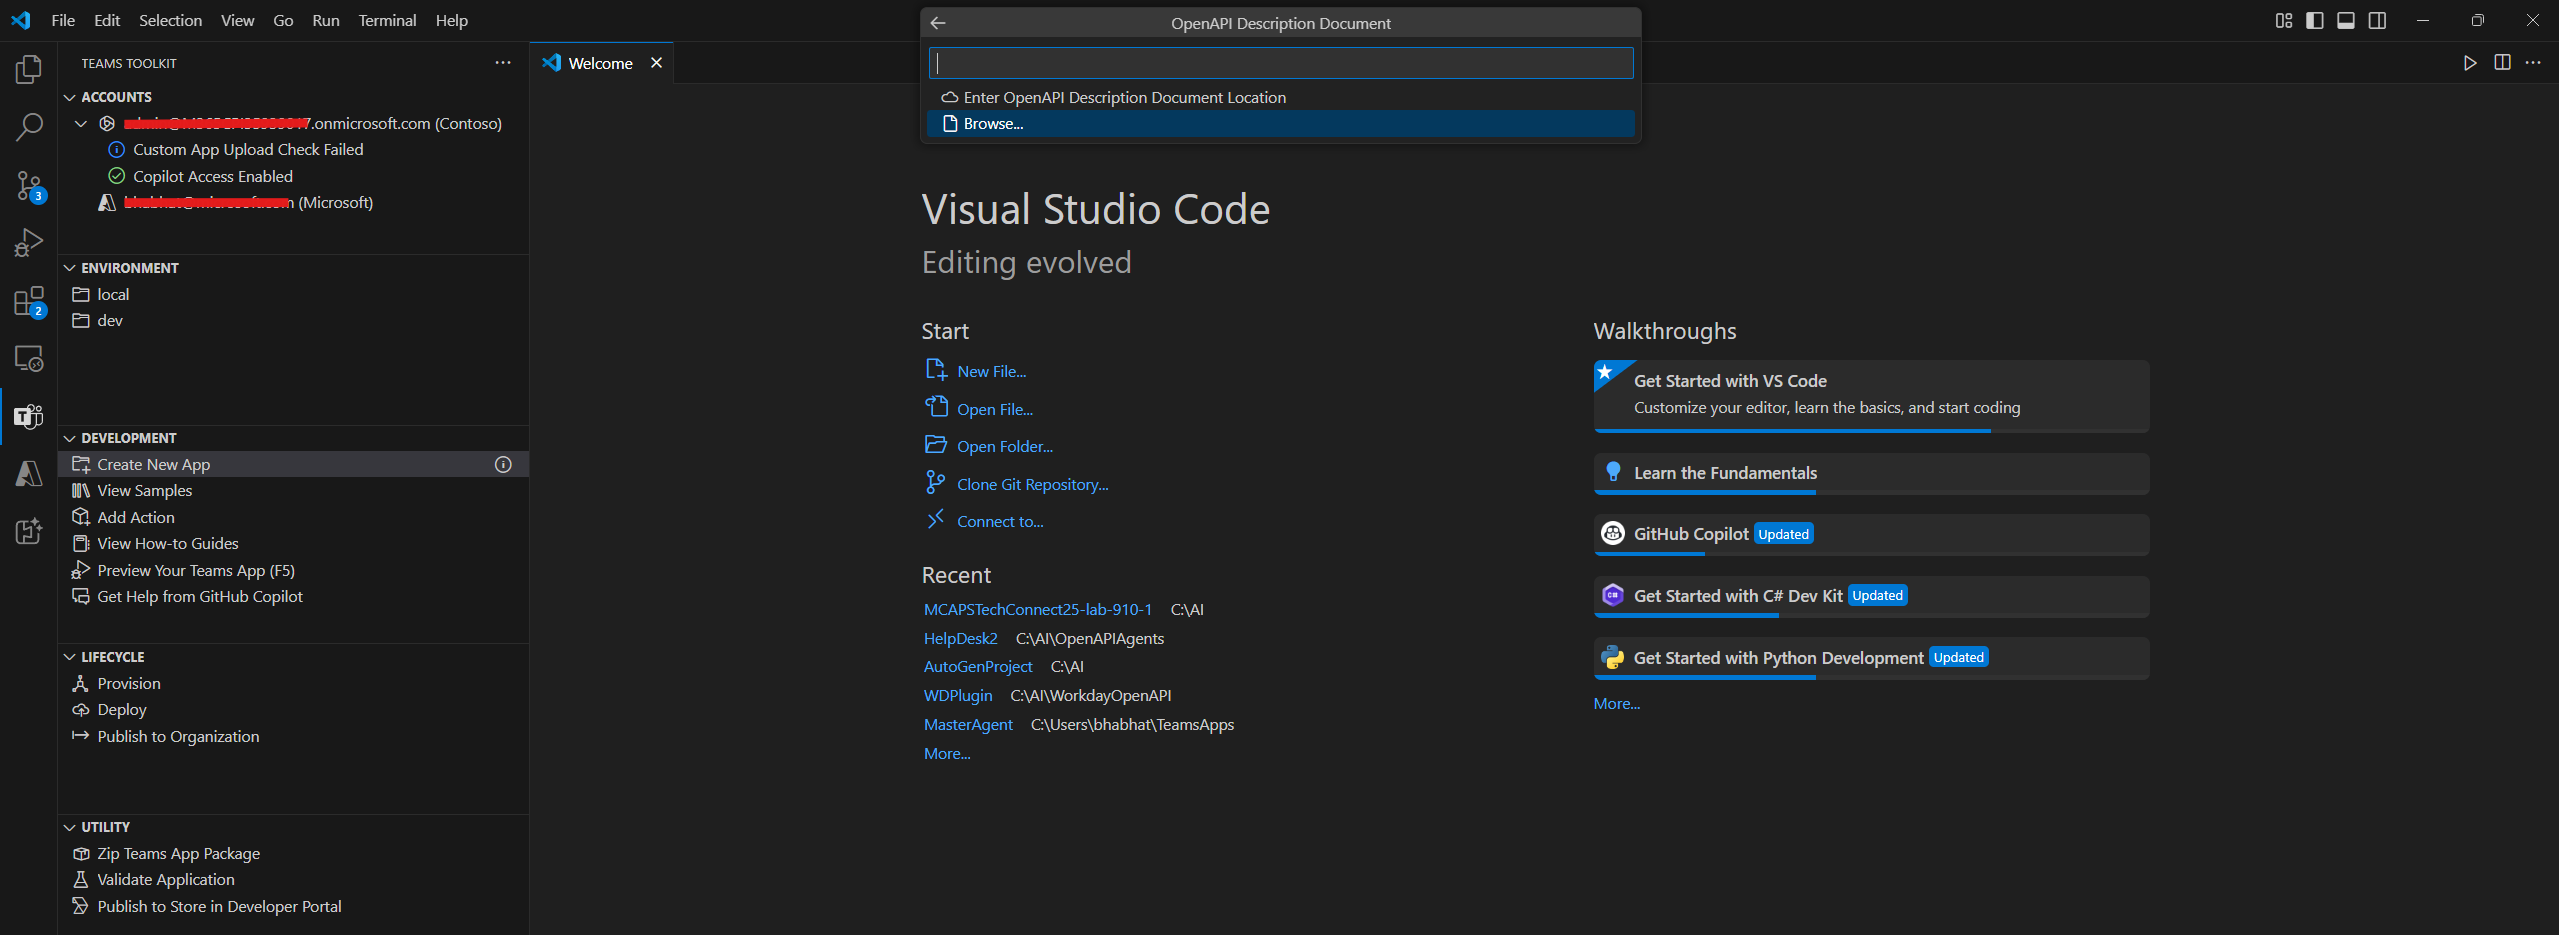
Next, we will select Start with an OpenAPI Description Document. For this exercise, we have already created a OpenAPI message specification document that we will use, that you can download from here.
Now, let’s browse and select the OpenAPI message specification file:
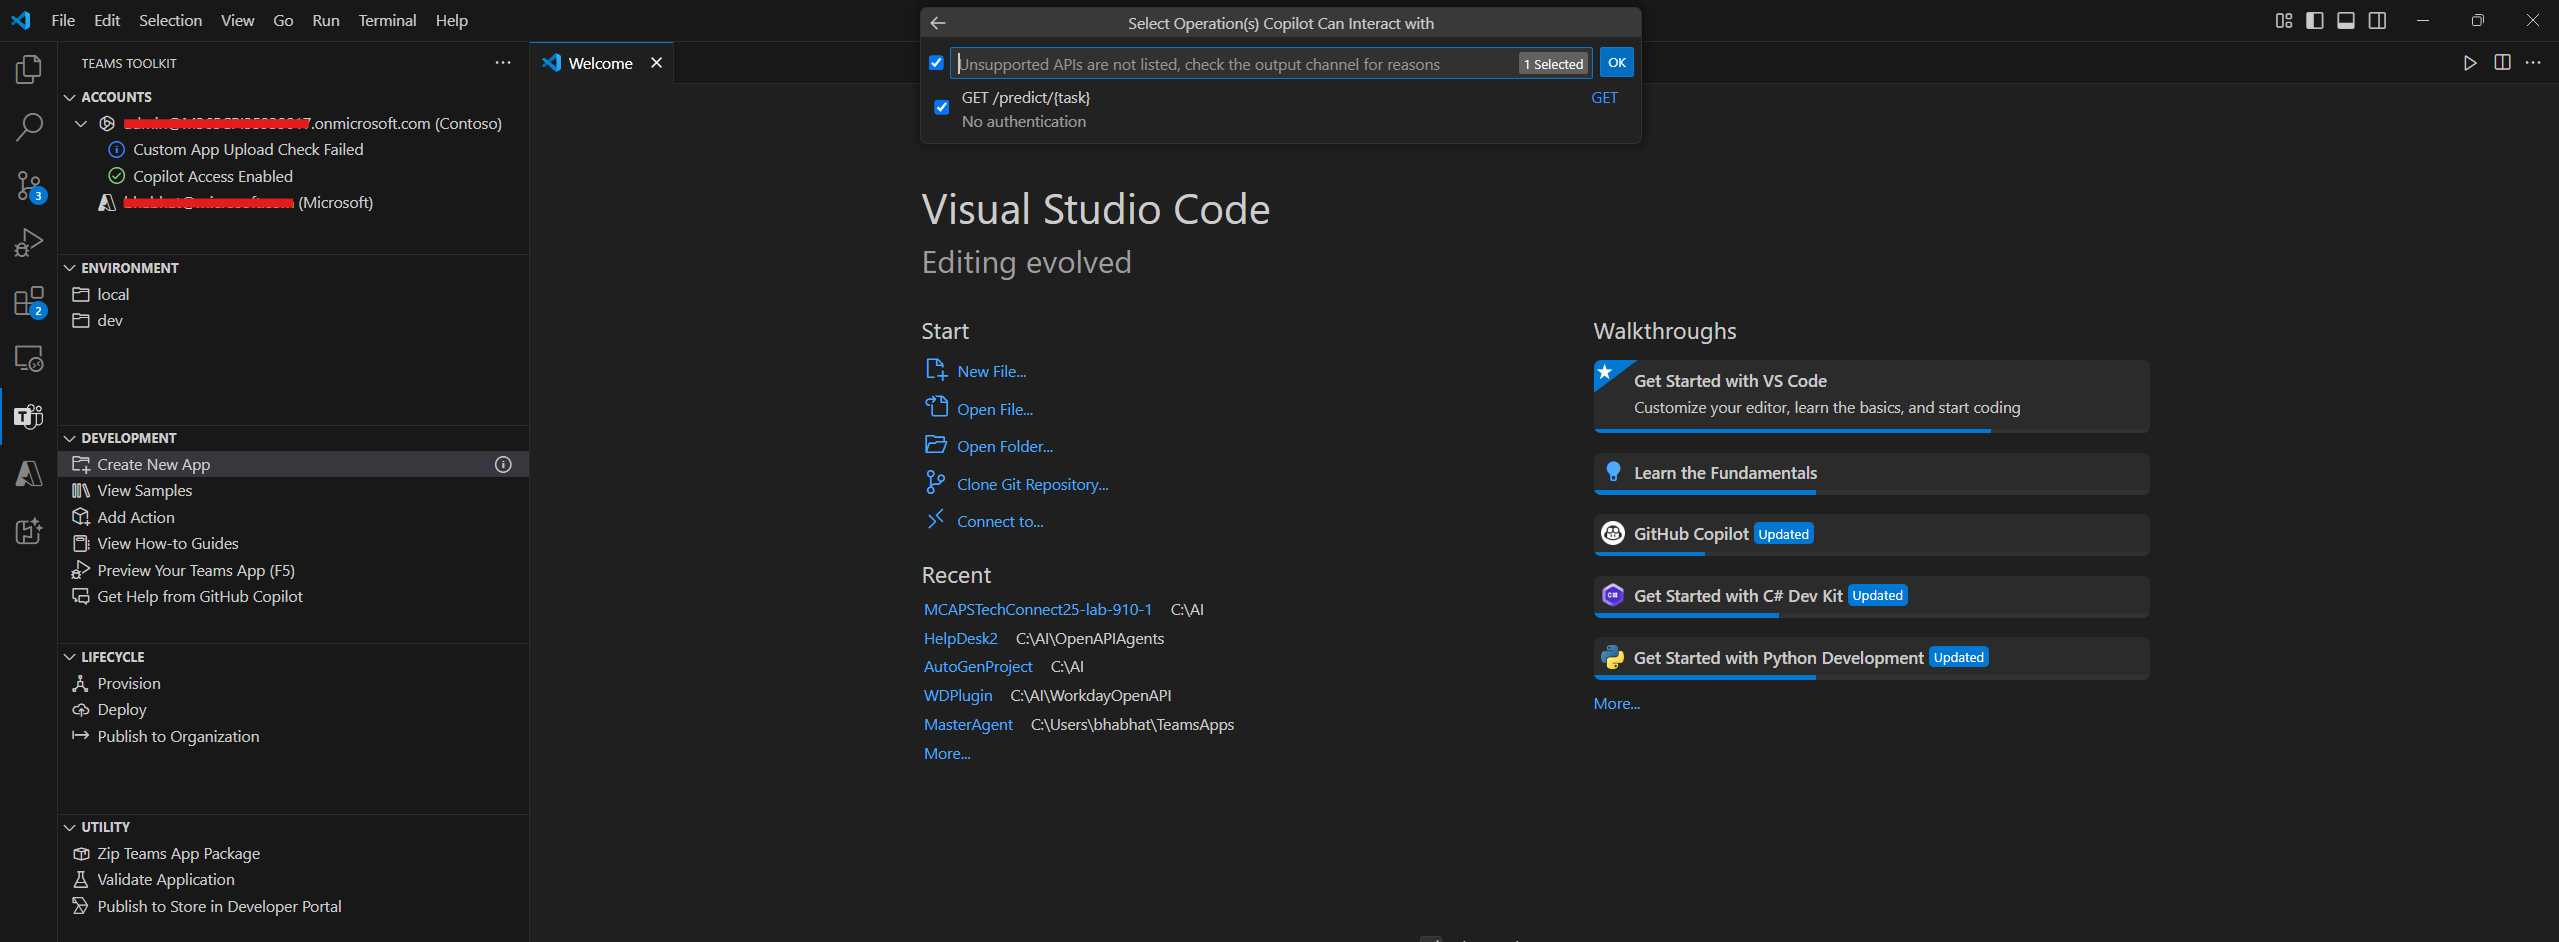
Once the file is parsed, we will be presented with the API endpoints that are described in the file. Select the GET call and press Ok.
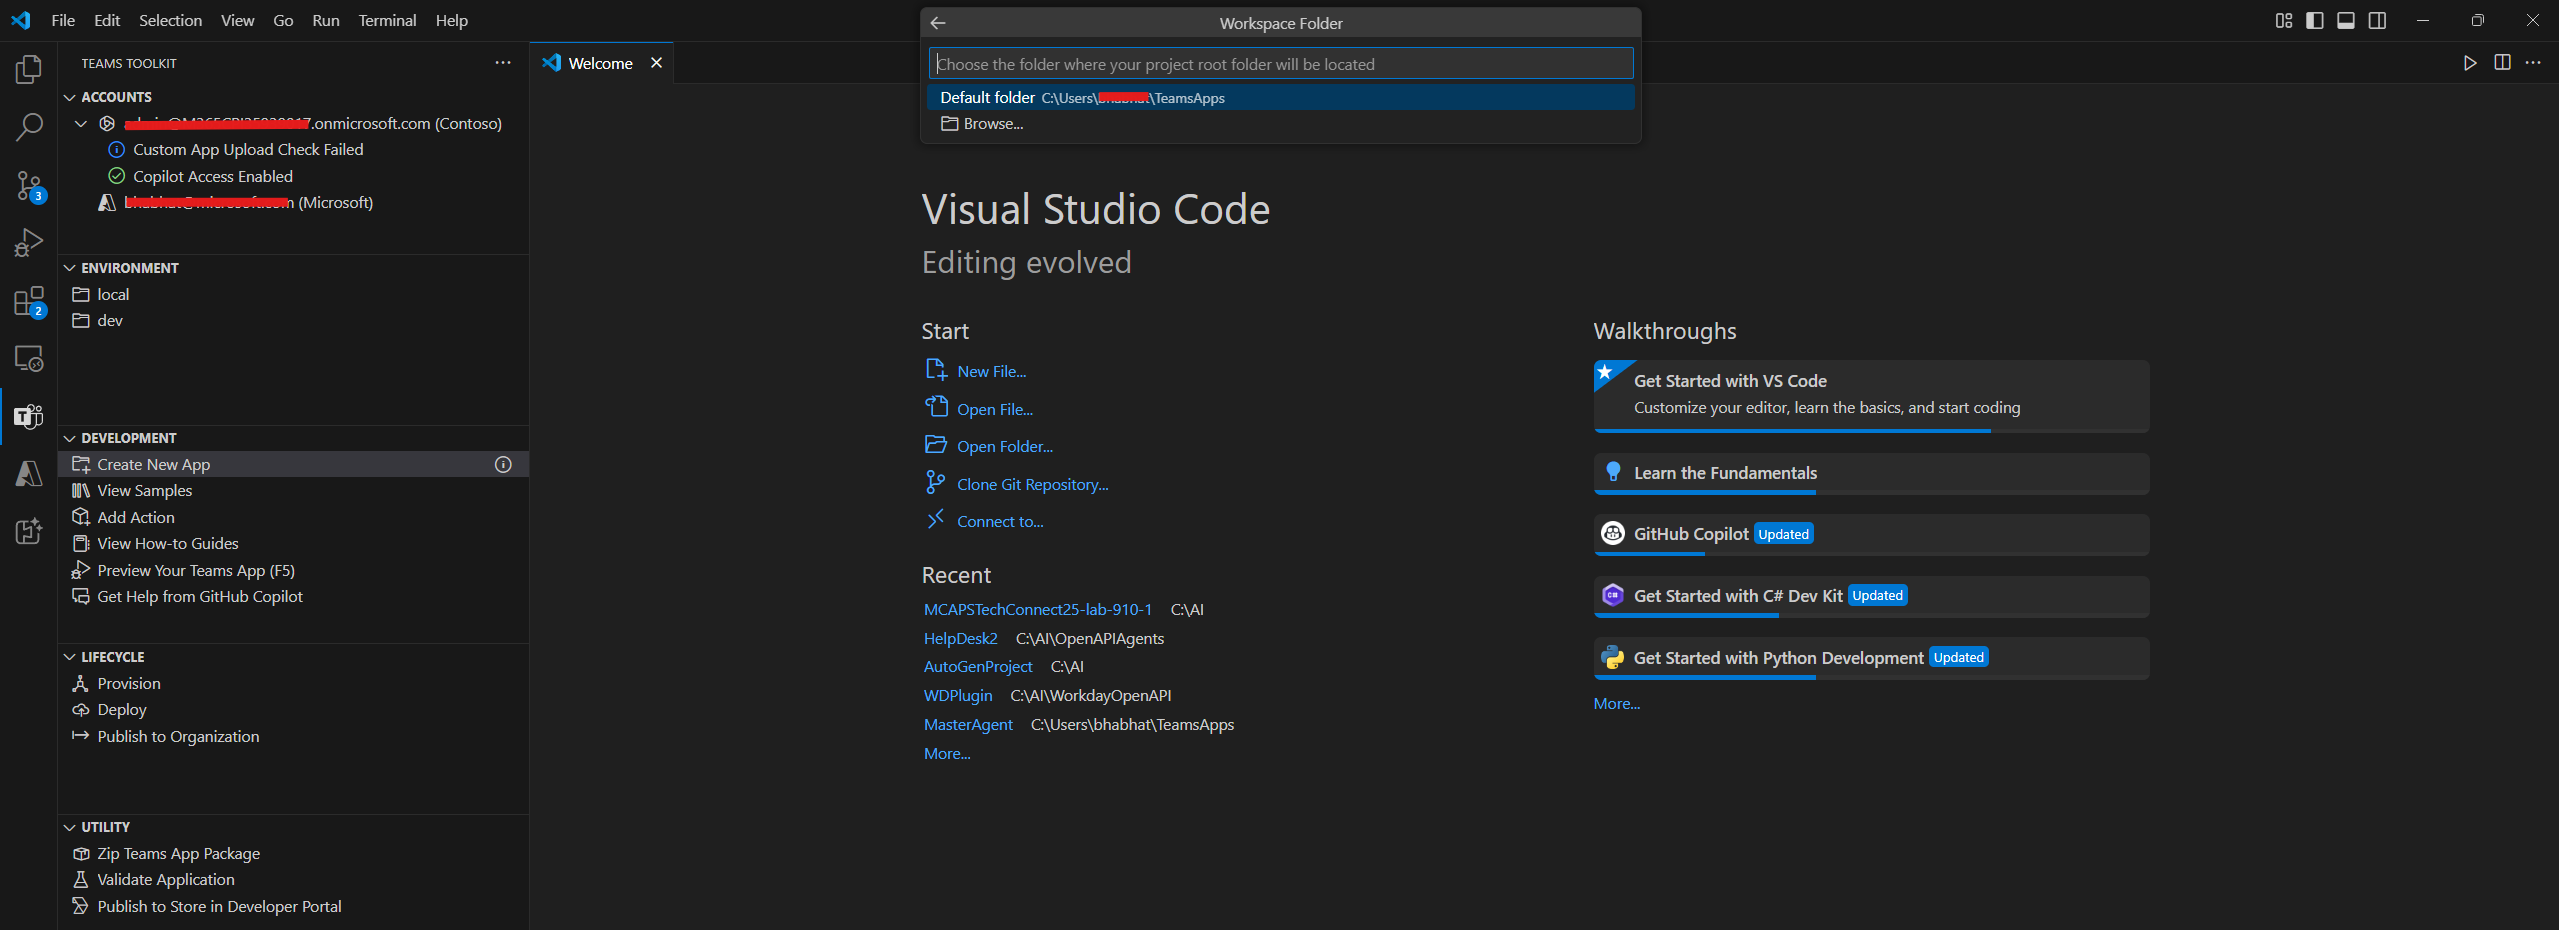
Then, select the location for the project’s root folder:
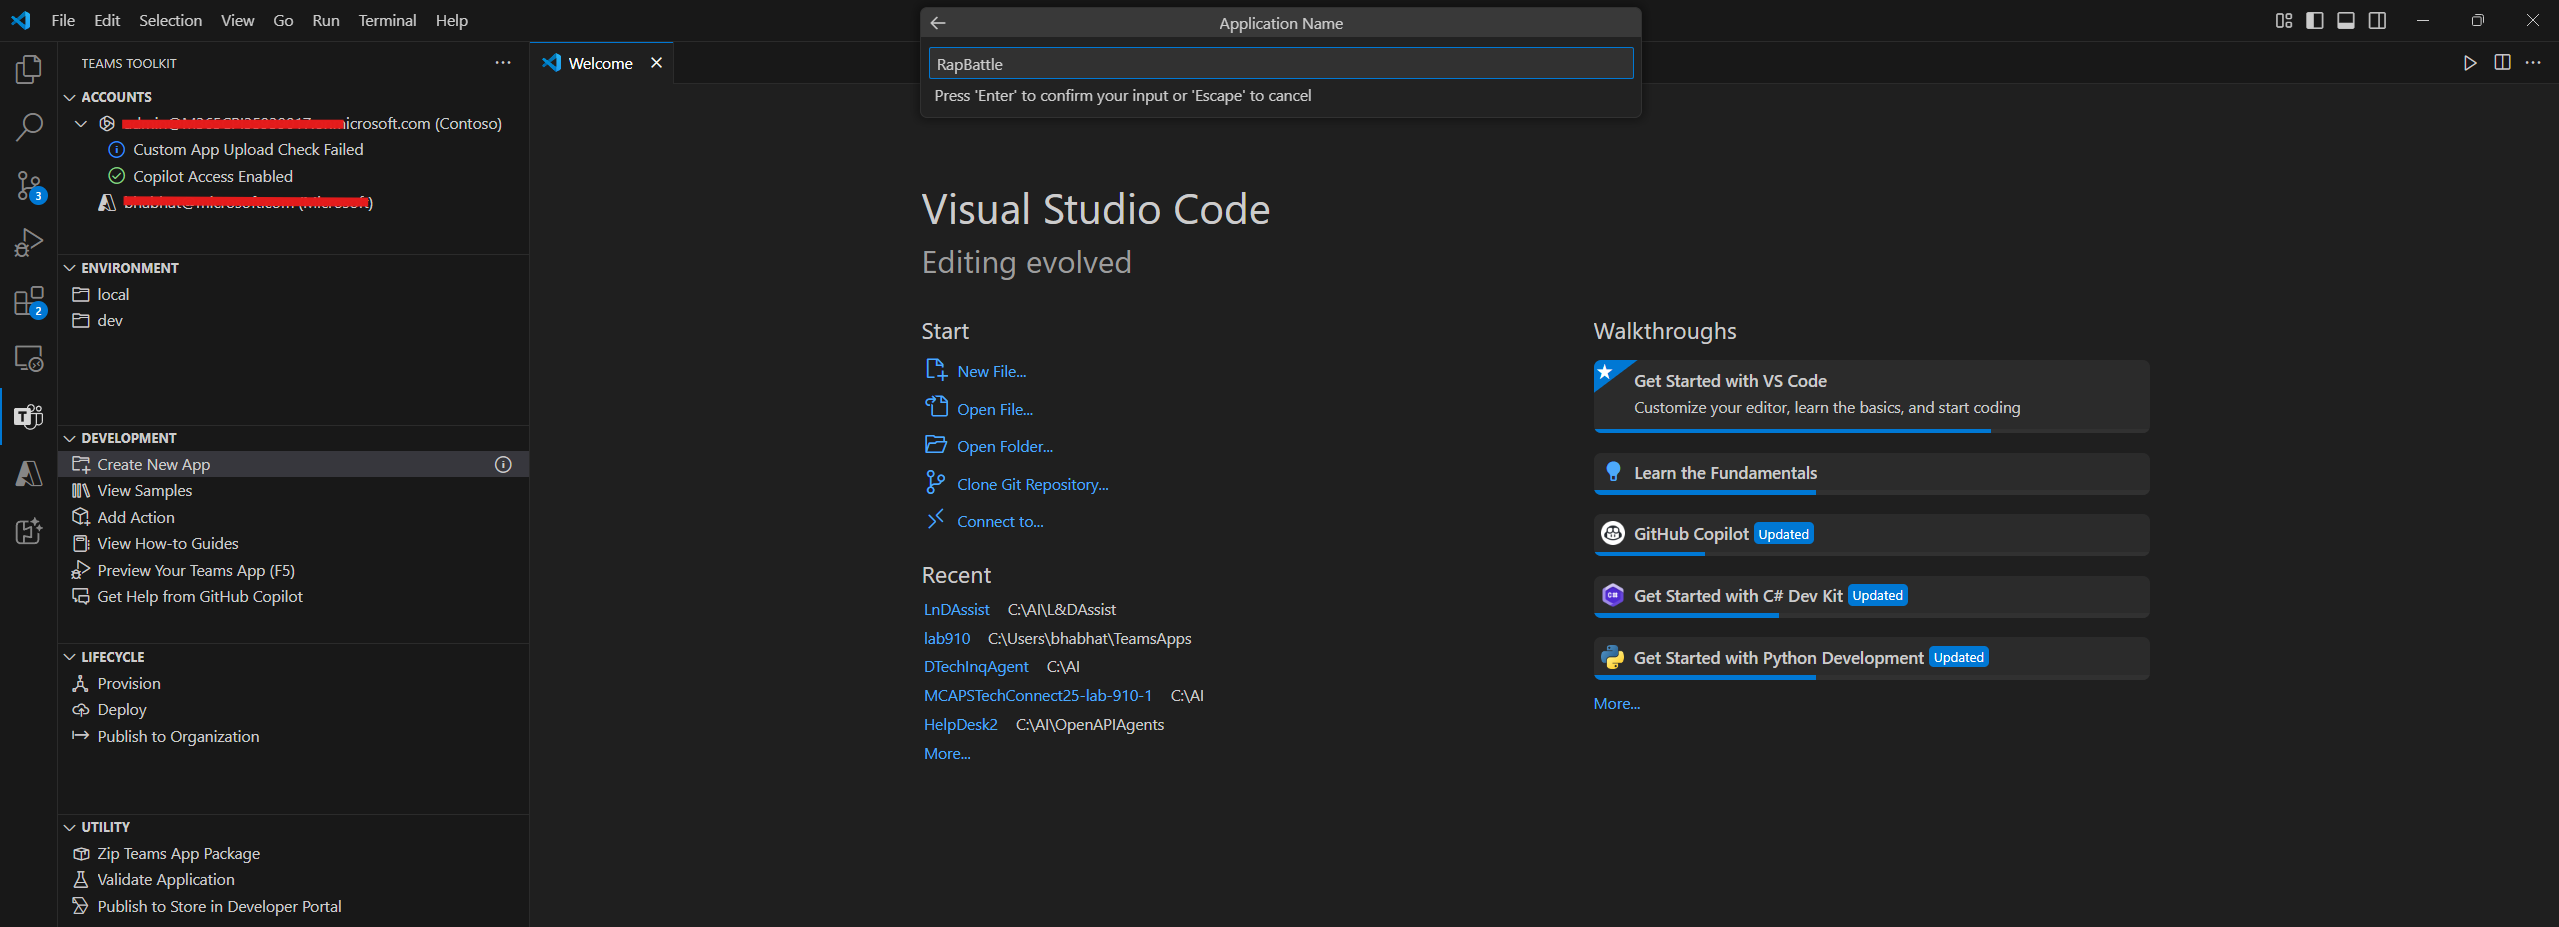
Give the application a name of your choice and enter to confirm.
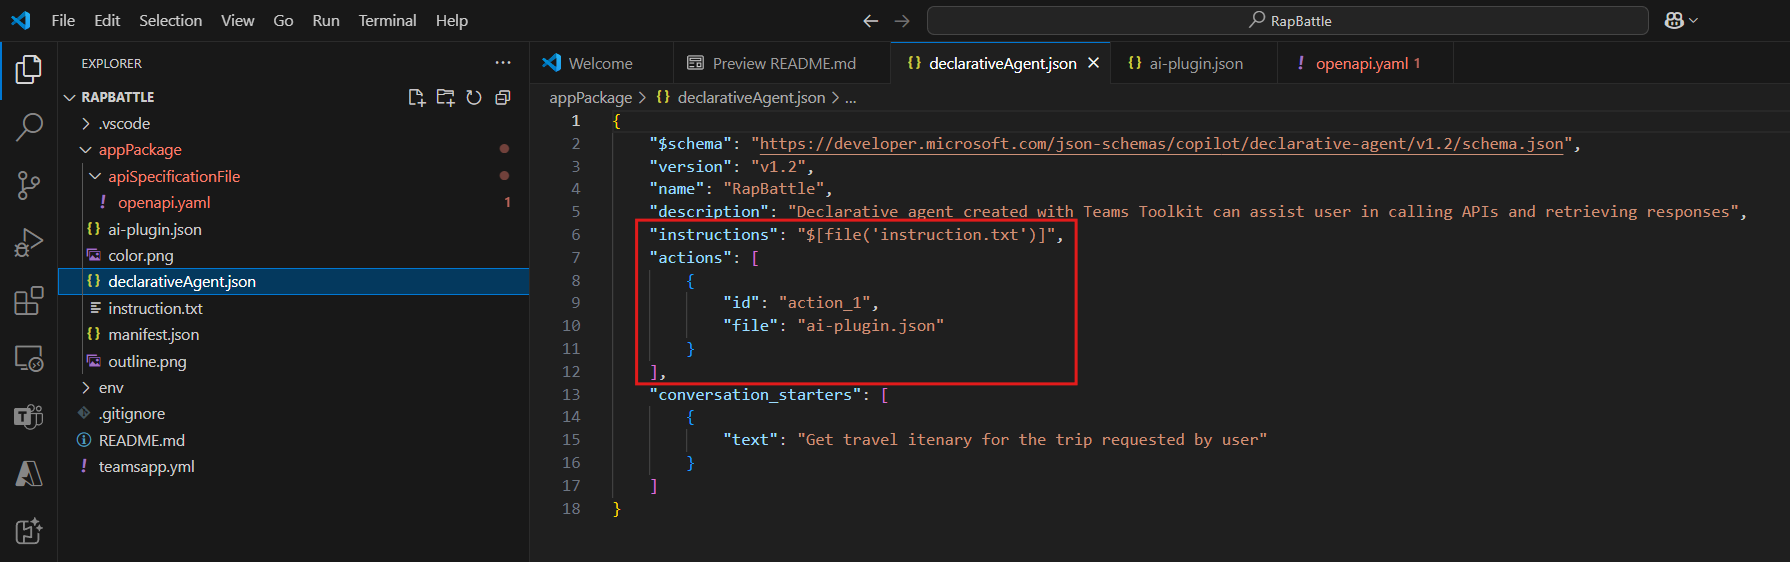
A window with the Declarative Agent project loaded should appear. I have highlighted the purpose of the 4 main files in the image below for reference:
declarativeAgent.json contains the main definition of the agent. It points to the instruction.txt file for instructions and ai-plugin.json for details on the actions that the Declarative Agent can perform.
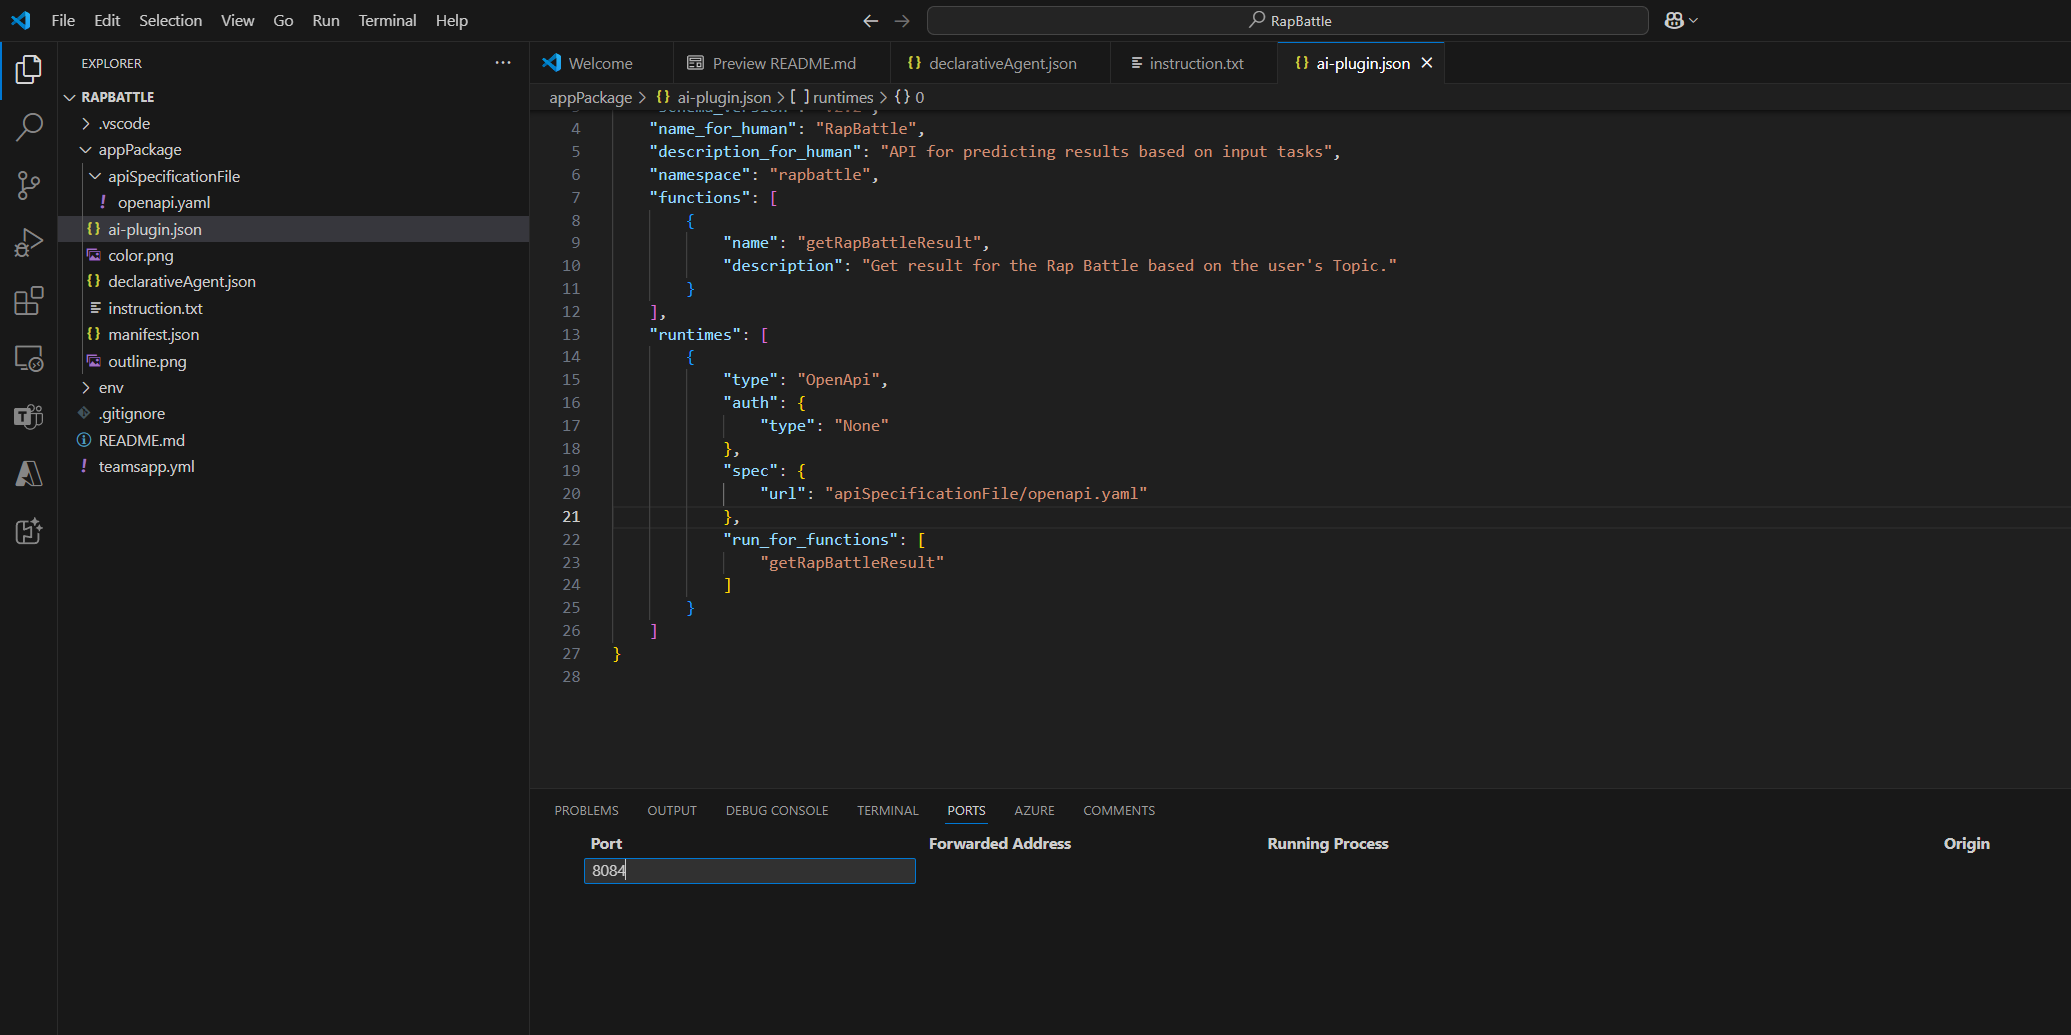
ai-plugin.json contains details on the functions that the agent can trigger. In our case, we have just 1 function called
getRapBattleResult. If you look at line 20, in the pic below, you will see that it refers to the openapi.yaml file that contains the actual OpenAPi specification of the API calls, which we previously imported during the wizard. Therun_for_functionssection at the bottom of the file indicates the list of functions out of all the functions available in the OpenAPI specification file that the declarative agent will have access to. We have only providedgetRapBattleResultas that is the only call we want to make.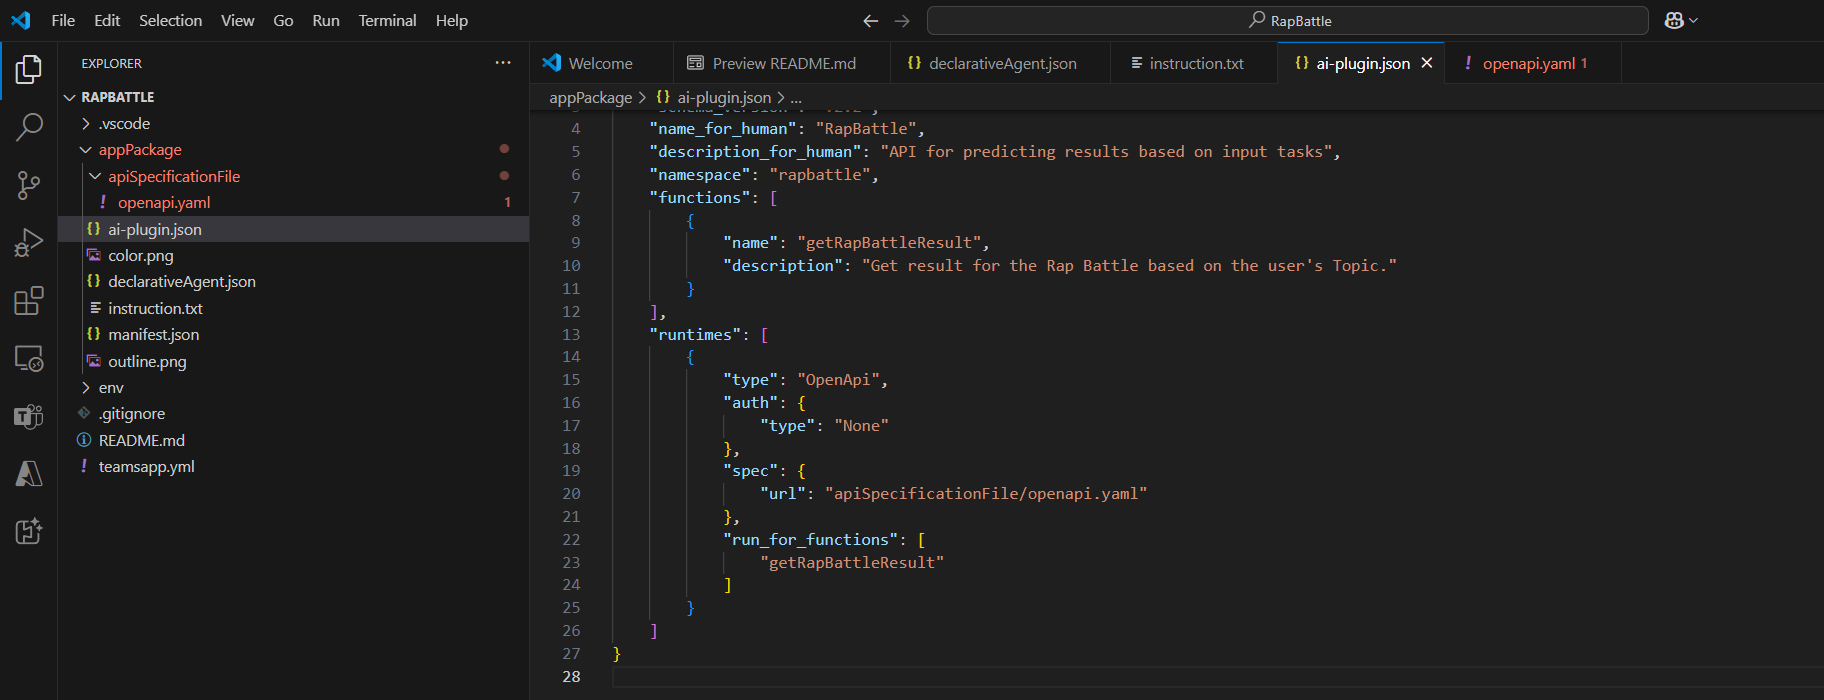
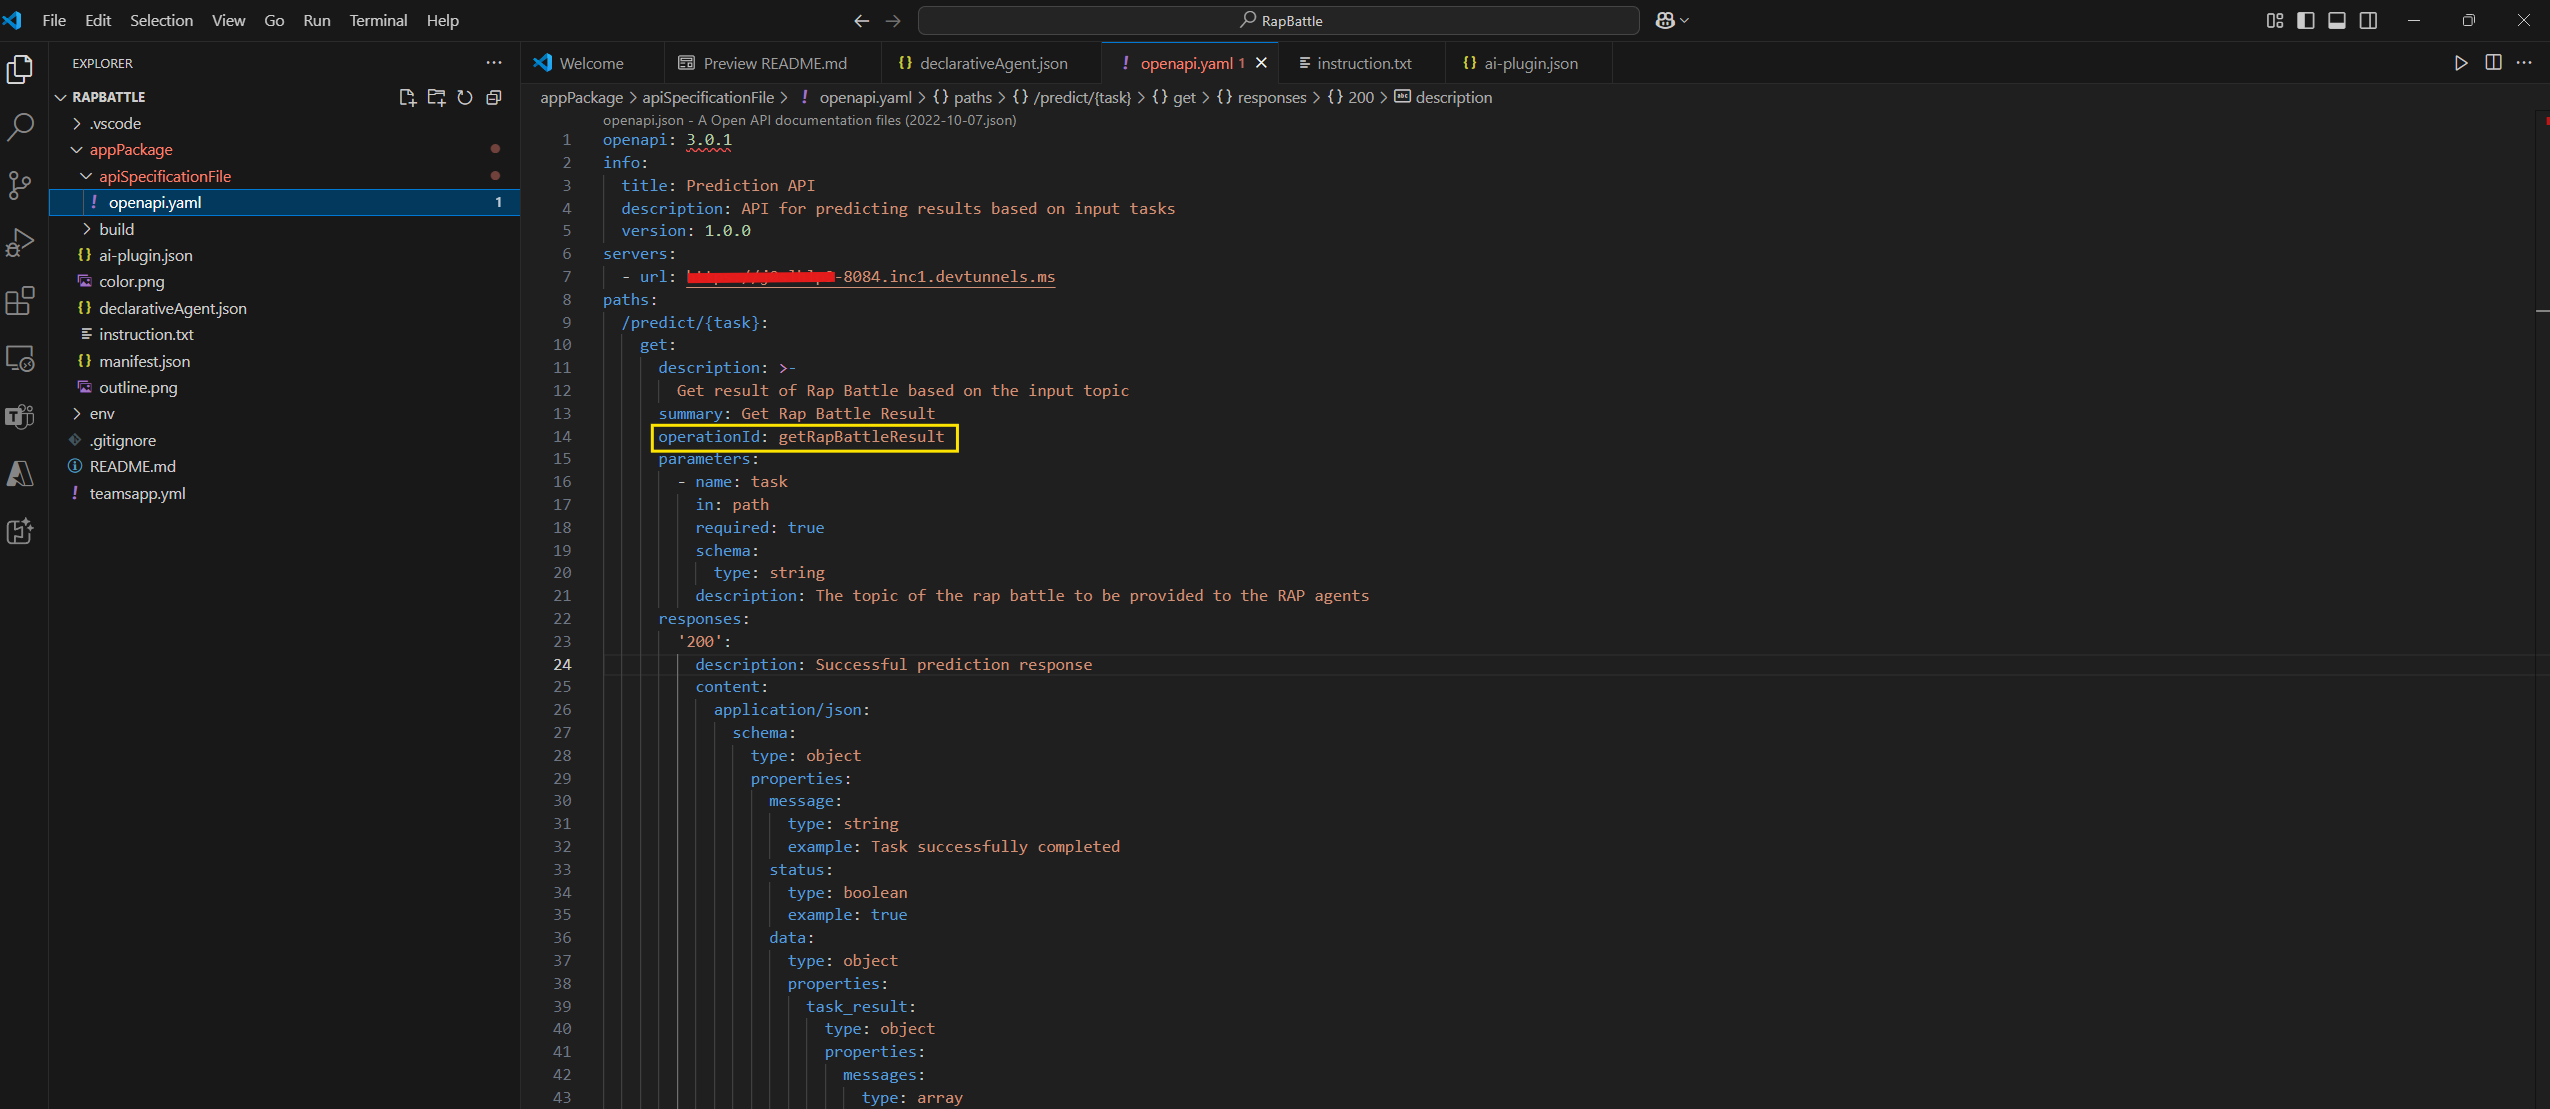
openapi.yaml contains the full OpenAPI specification of the API we have imported. There are three key points to highlight in the file:
- For every API endpoint, we have the full structure of the request and the response.
- The
operationIdparameter, which contains the same function namegetRapBattleResultas we used it in theapi-plugin.jsonfile. - The
urlparameter, which is the base endpoint of the server that the declarative agent will use to make the API calls. We’re going to set it later, once we have created a Dev Tunnel that we can use to expose our local server to the internet, so that Copilot can reach it.
Setting up port forwarding
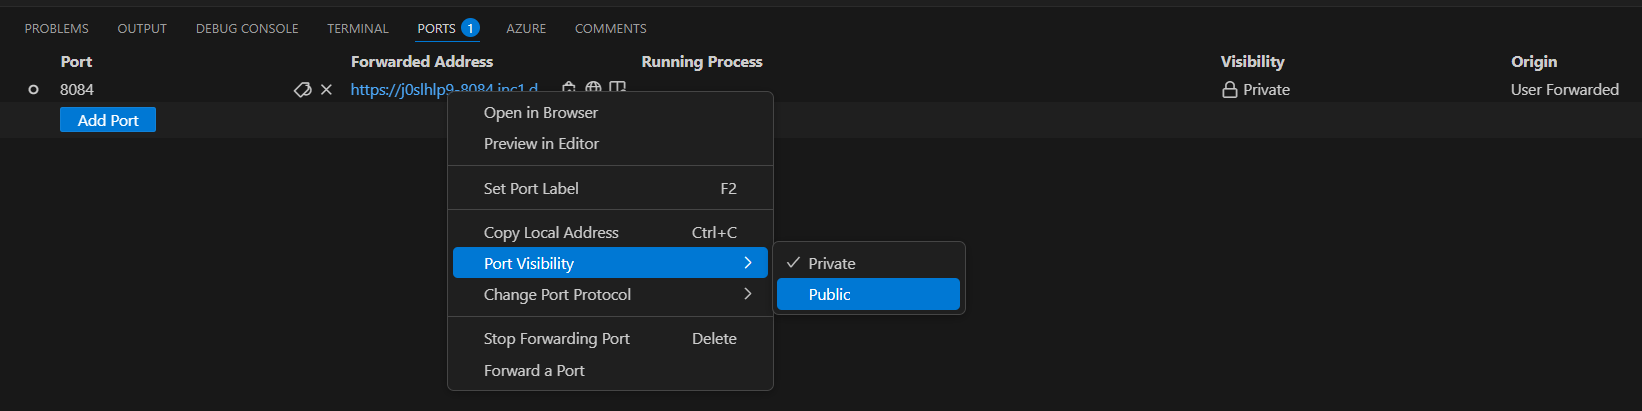
Now that we have configured the declarative agent we need to provision it so it can be available within Copilot. But before we do that we have one last task to complete. The AutoGen Studio server will run locally and point to port 8084. We will need to make this port publicly available, since Copilot can’t reach our local server. Let’s go to Ports view in the Panel region of Visual Studio Code and select Forward a Port. If you haven’t logged in with GitHub before, you’ll be prompted to sign in. Enter 8084 as the port we want to be forwarded.
Visual Studio Code will generate a public URL for you, as you can see from the following image:
Now we have a forwarded address but the visibility of this address is still private. Lets change it to public, by right clicking on it and choose Port Visibility -> Public.
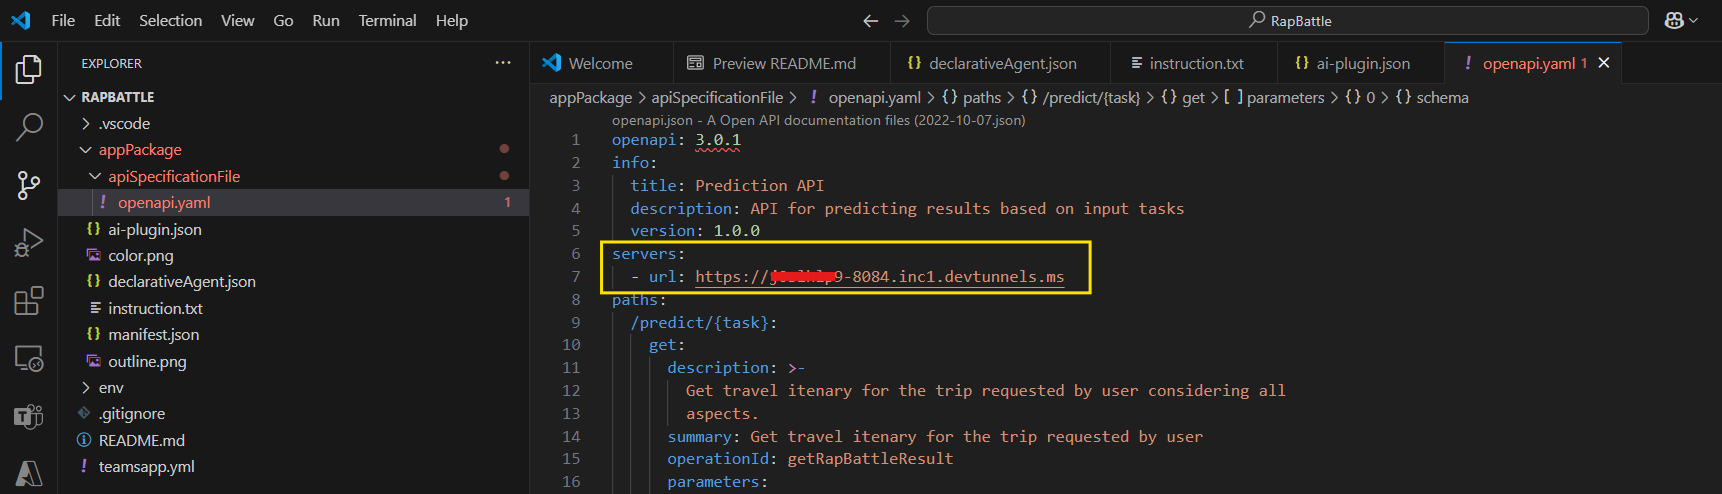
We will now need to copy the forwarded address URL (the one in the 2nd column) in the openapi.yaml file, as this will be the base url to make the API call:
Testing our scenario
Now, we are done with all changes and its time to test the solution. So, we need to first to start the AutoGen Studio server. Let’s open the Anaconda PowerShell Prompt and use conda to activate the virtual environment we have created in the first post. Then, we can execute AutoGen Studio, this time with a different command however since we don’t want to launch the UI, but host the team as an API:
| |
Make sure to provide the correct path to the team-config.json file that we downloaded earlier.
Now we can go back to Visual Studio code to provision the declarative agent. Select the Teams Toolkit icon from the left pane and select Provision under the LIFECYCLE section.
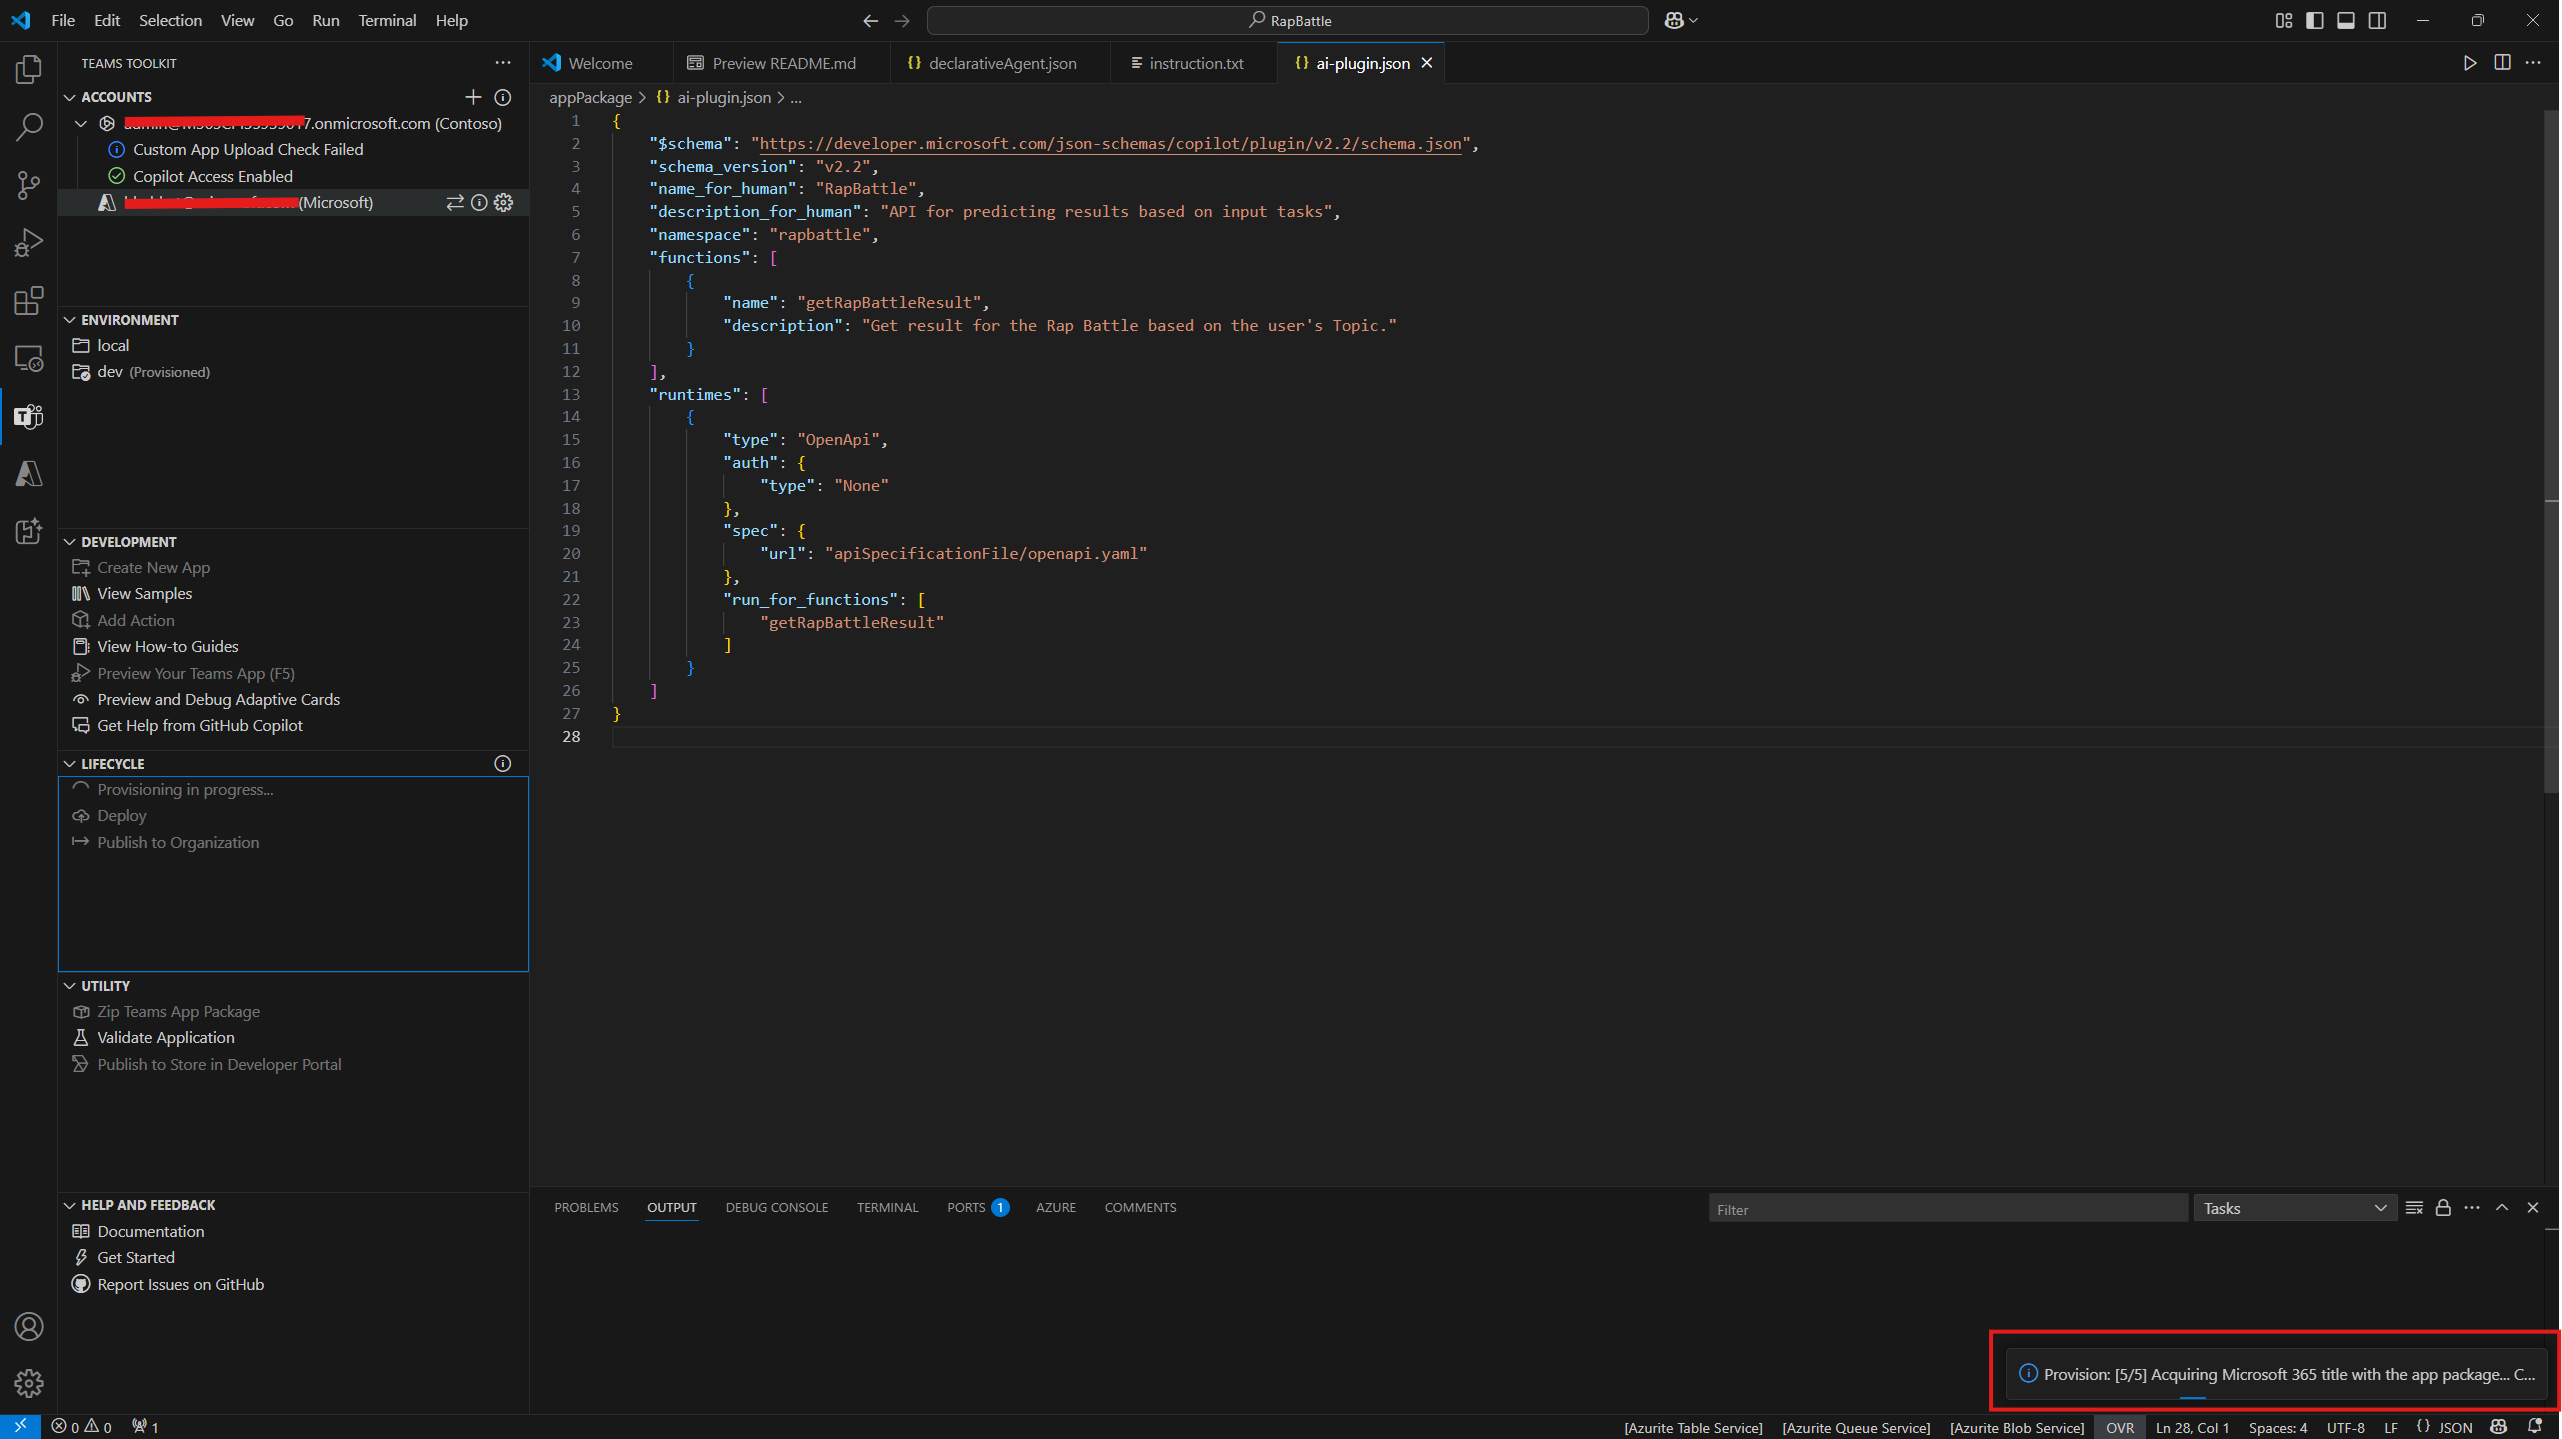
If the operation completes successfully, you should see message at the bottom right saying 5/5 actions in provision stage executed successfully.
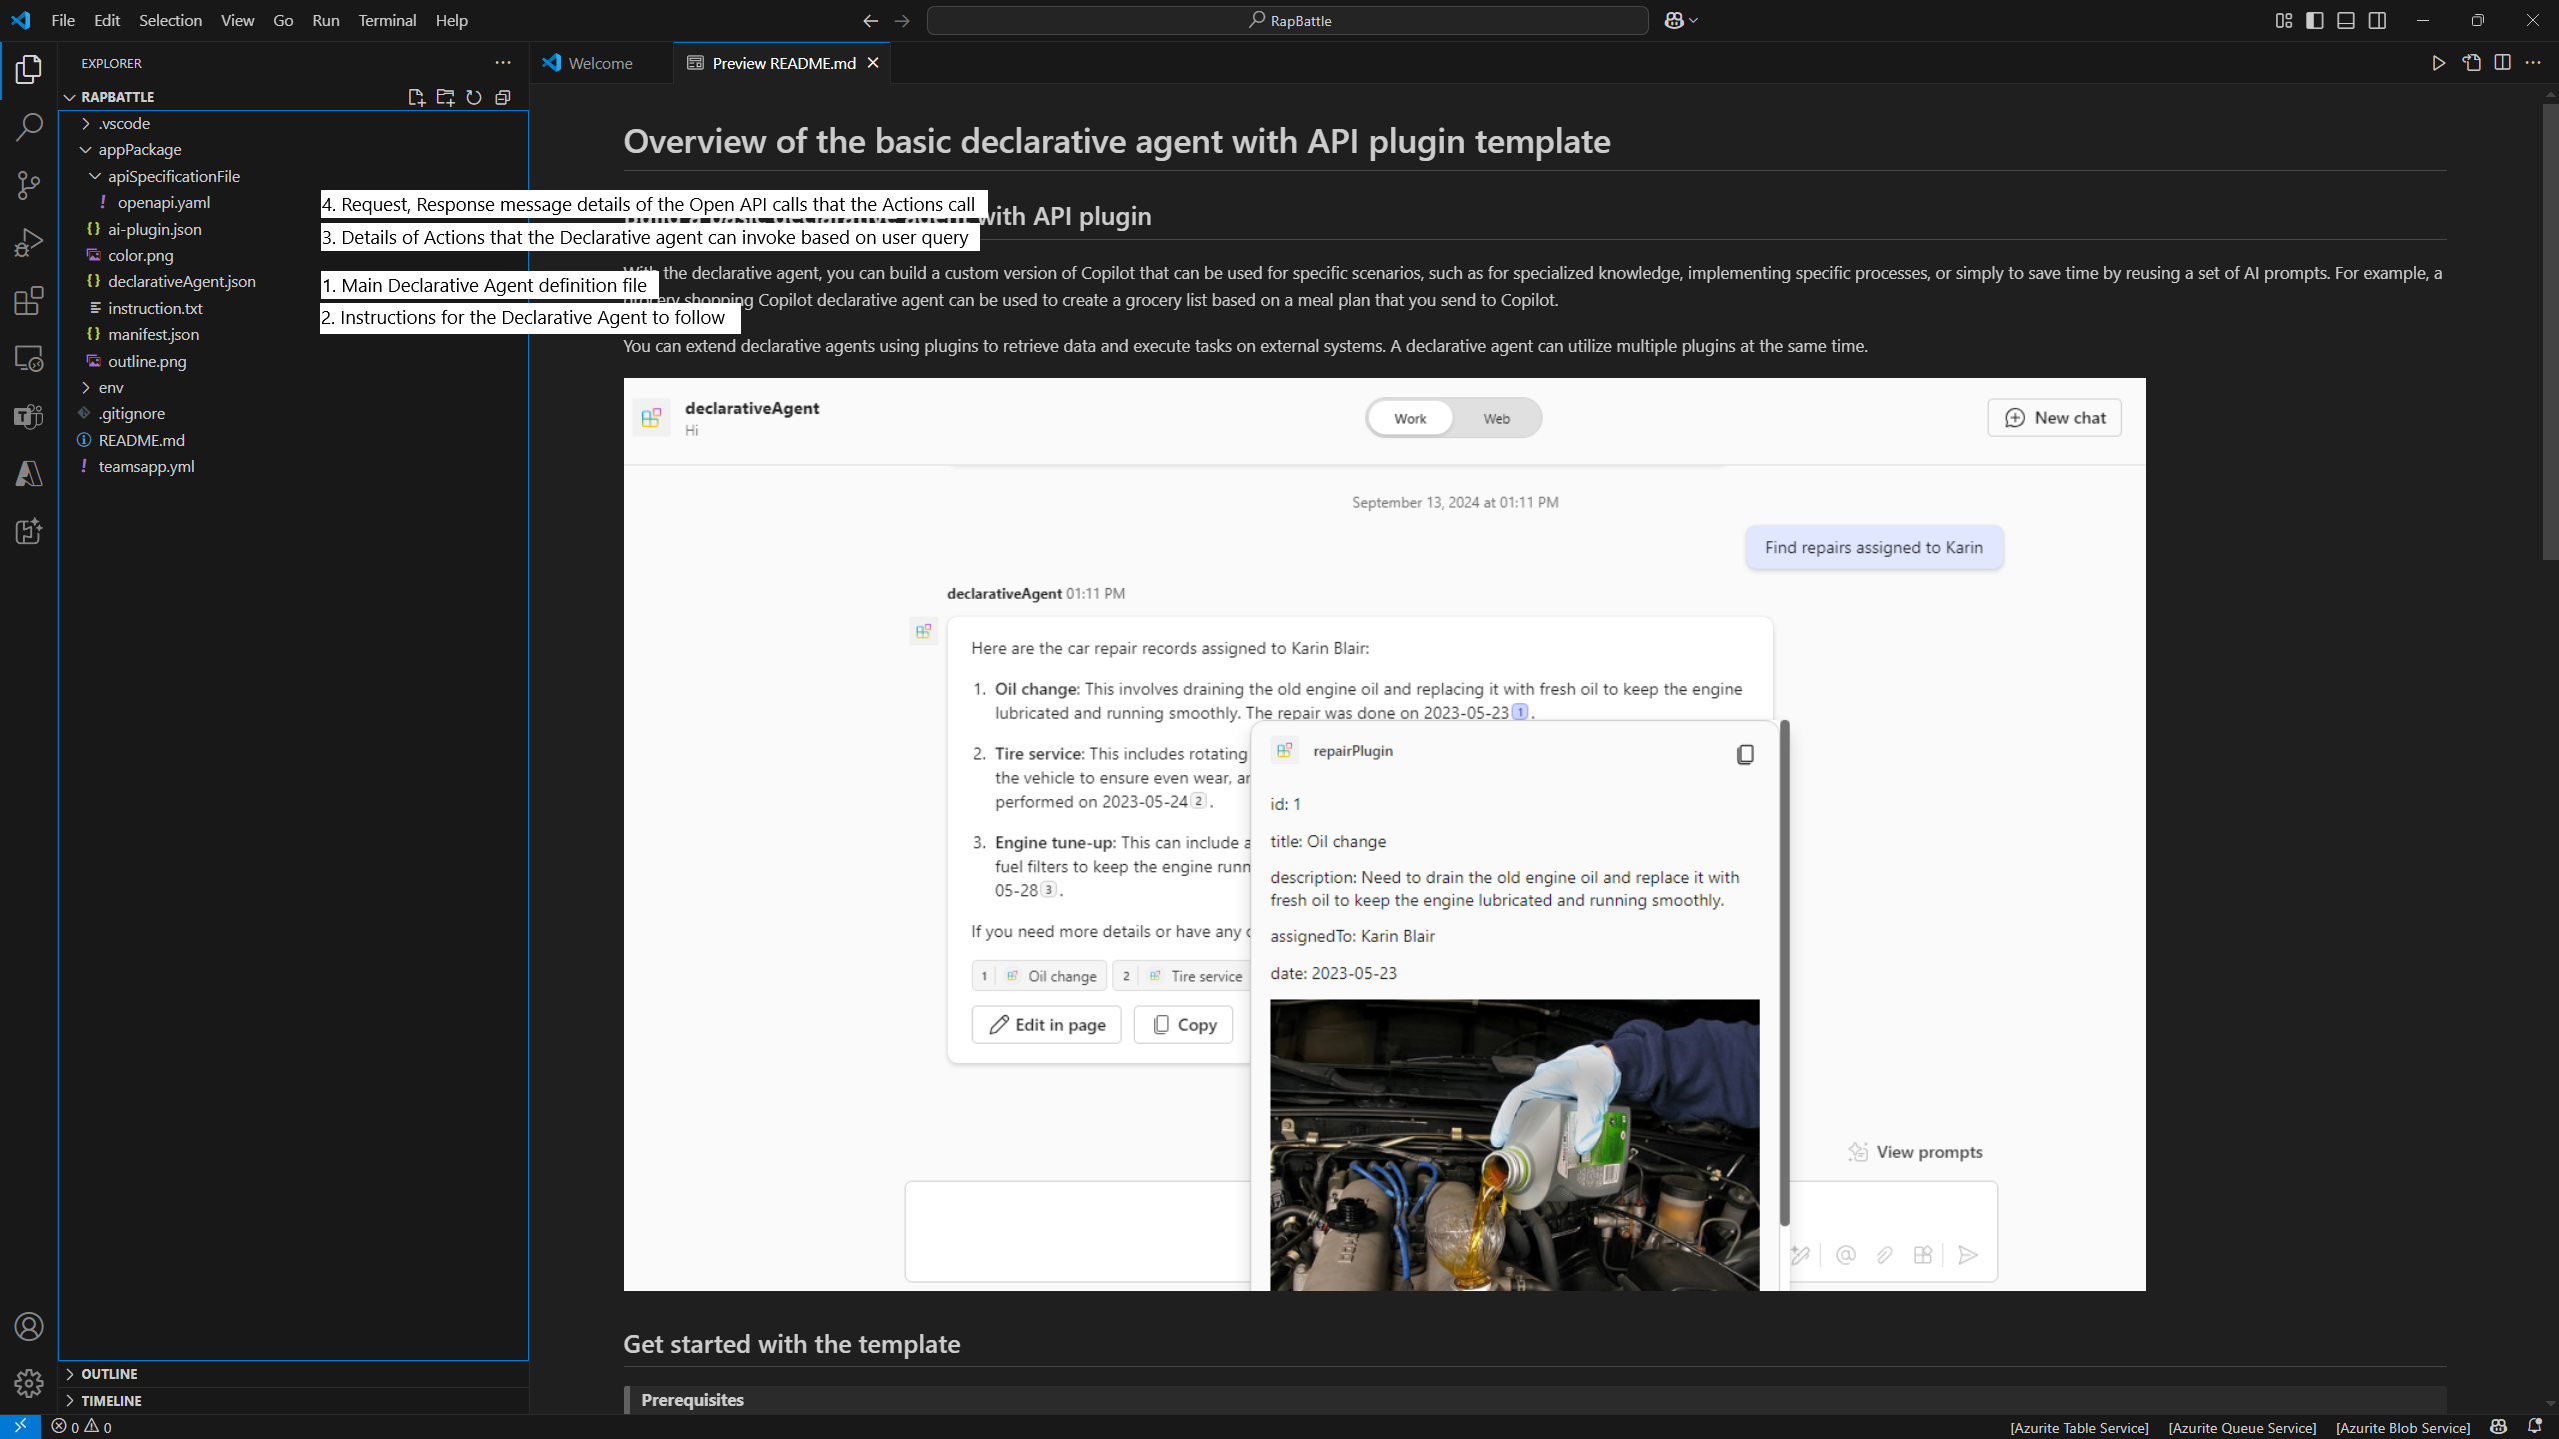
Now that we have AutoGen Studio running in server mode with the port forwarded and publicly available and the Declarative agent provisioned into Copilot in Teams, its time to test it! Open Microsoft 365 Copilot in one of the many ways you can access it (the official website, the Windows app or inside Teams), and you should see the Declarative Agent available in the right pane. Select it and provide the prompt to start the rap battle, for example:
| |
As this is the first time we are running the agent, once we prompt it to run the Rap Battle, it will ask for our consent. Let’s select Always allow.
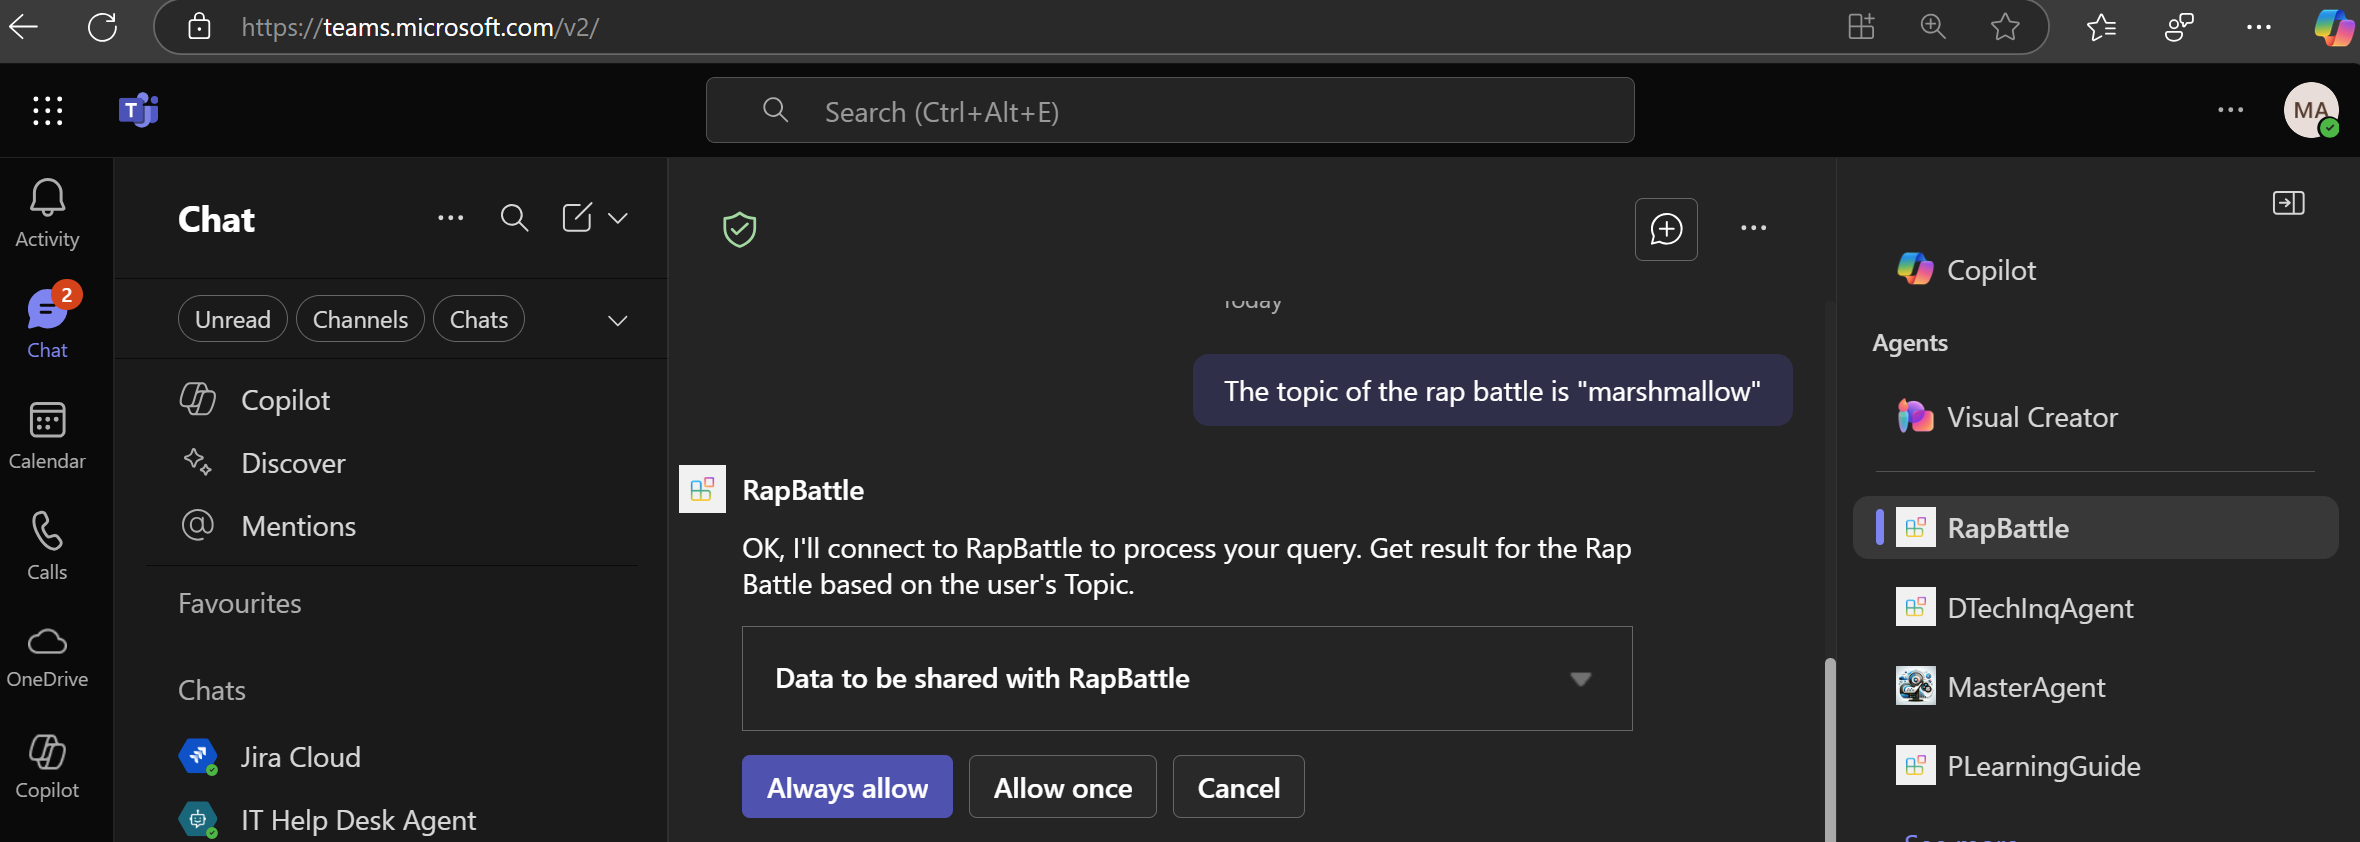
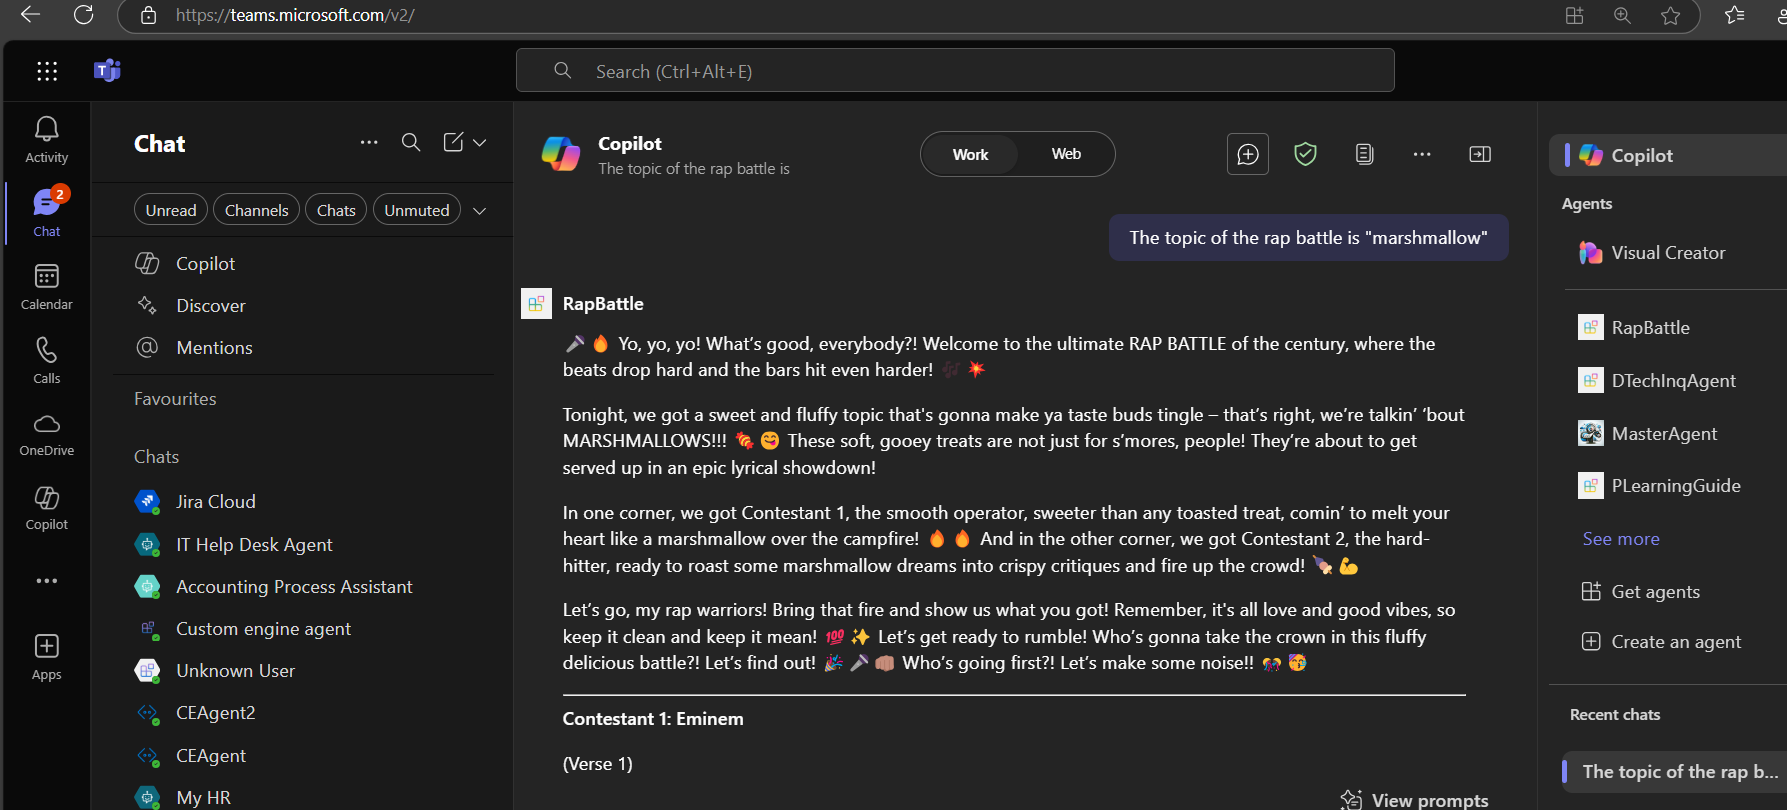
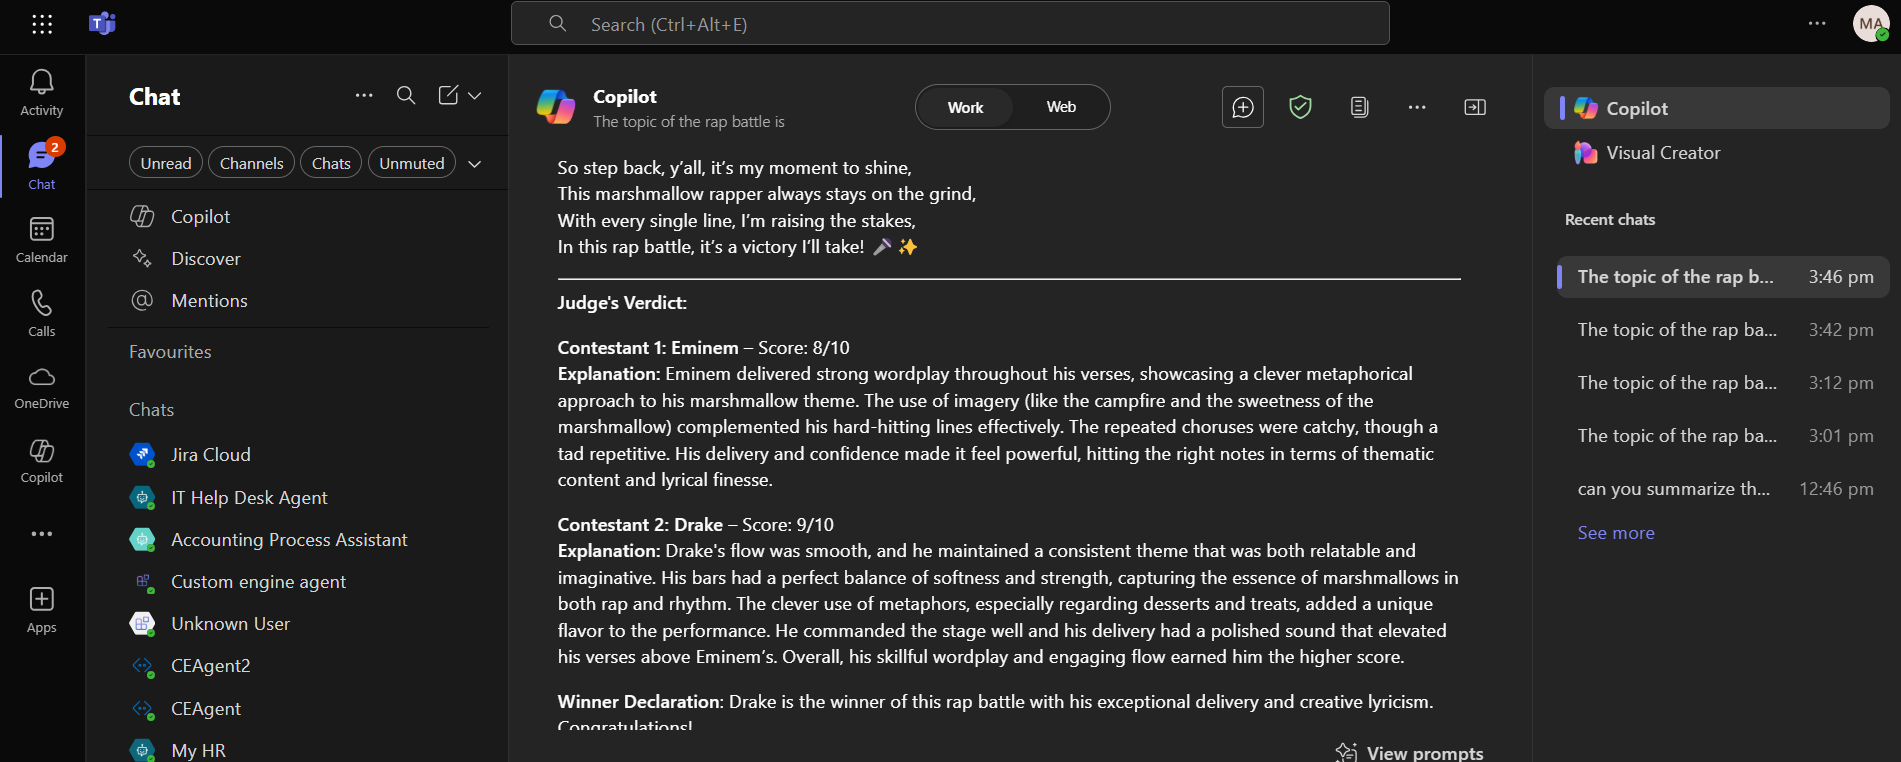
And you should start seeing the results of the Rap Battle showing up in the Copilot response 🙂
If you want to see what’s going on behind the scenes, you can:
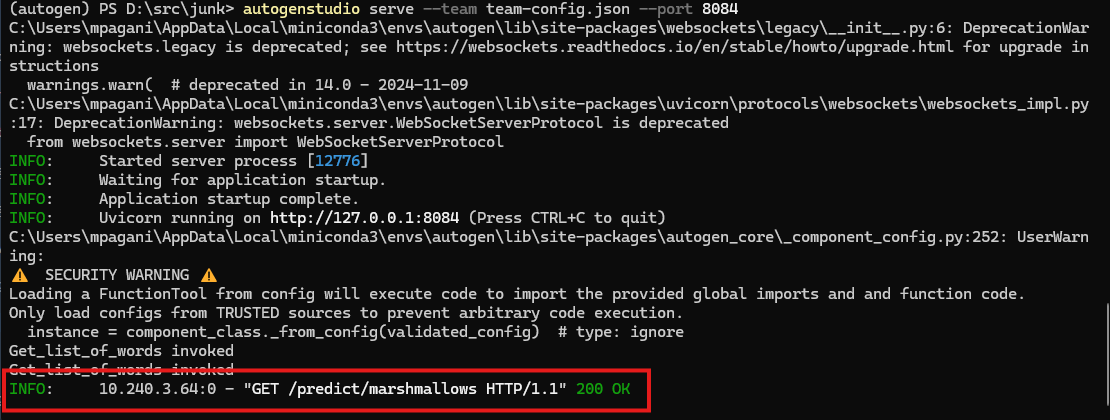
Move to the terminal window. You will see that the agent as called the API endpoint exposed by AutoGen Studio:
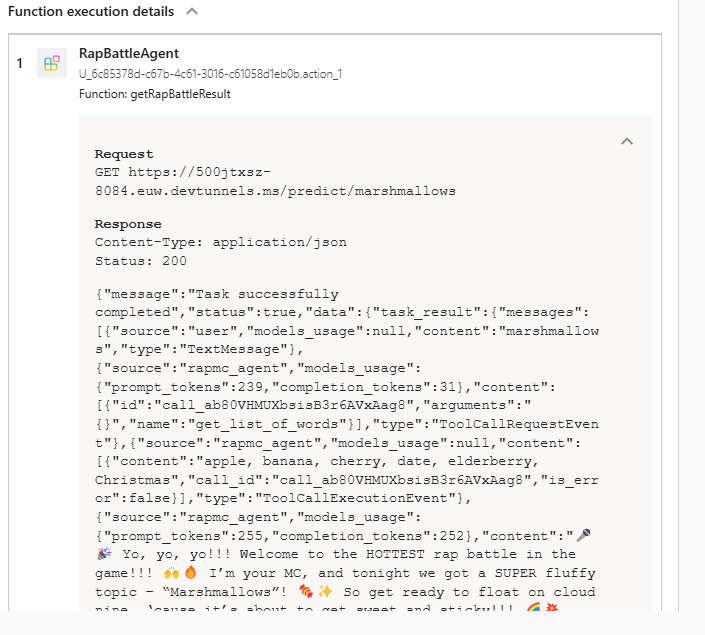
You can turn on developer mode in Copilot by typing the following prompt:
1-developer onSubmit again a new prompt to start another rap battle, this time you will the logs of API calls right after the response
Wrapping up
In this post, we have seen how we can invoke a multi-agent architecture built with AutoGen from a Declarative Agent within Copilot. The rap battle was just an example to showcase the approach we can follow, which can be further explored with more relevant enterprise scenarios in which want to handoff tasks to a multi-agent team to be handled and executed separately.
You can find the declarative agent that we have built in this post on GitHub.
Happy agenting! 🤖🎤